Create a User Account in Customer Support Portal
To create a Customer Support Portal (CSP) user account, perform the following steps:
Step 1. Go to Customer Support Portal Create my account page
Step 2. Enter my email address
Step 3. Authenticate your email address
Step 4. Register a product
Step 5. Your CSP account
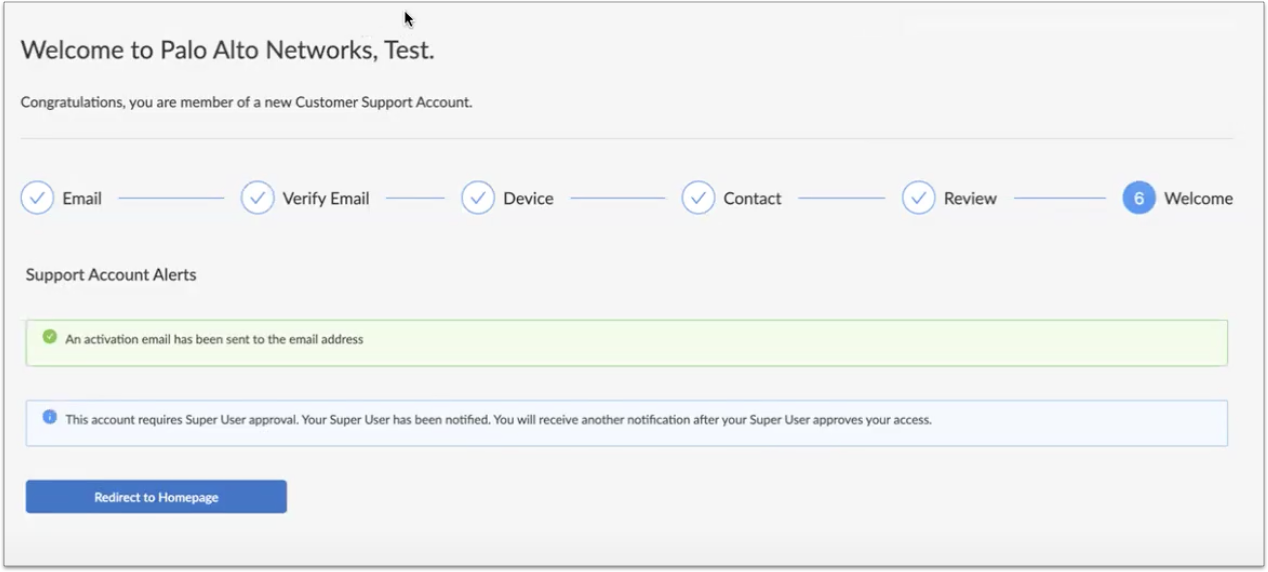
Step 6. Welcome to Customer Support Portal
Step 1. Go to Customer Support Portal Create my account page
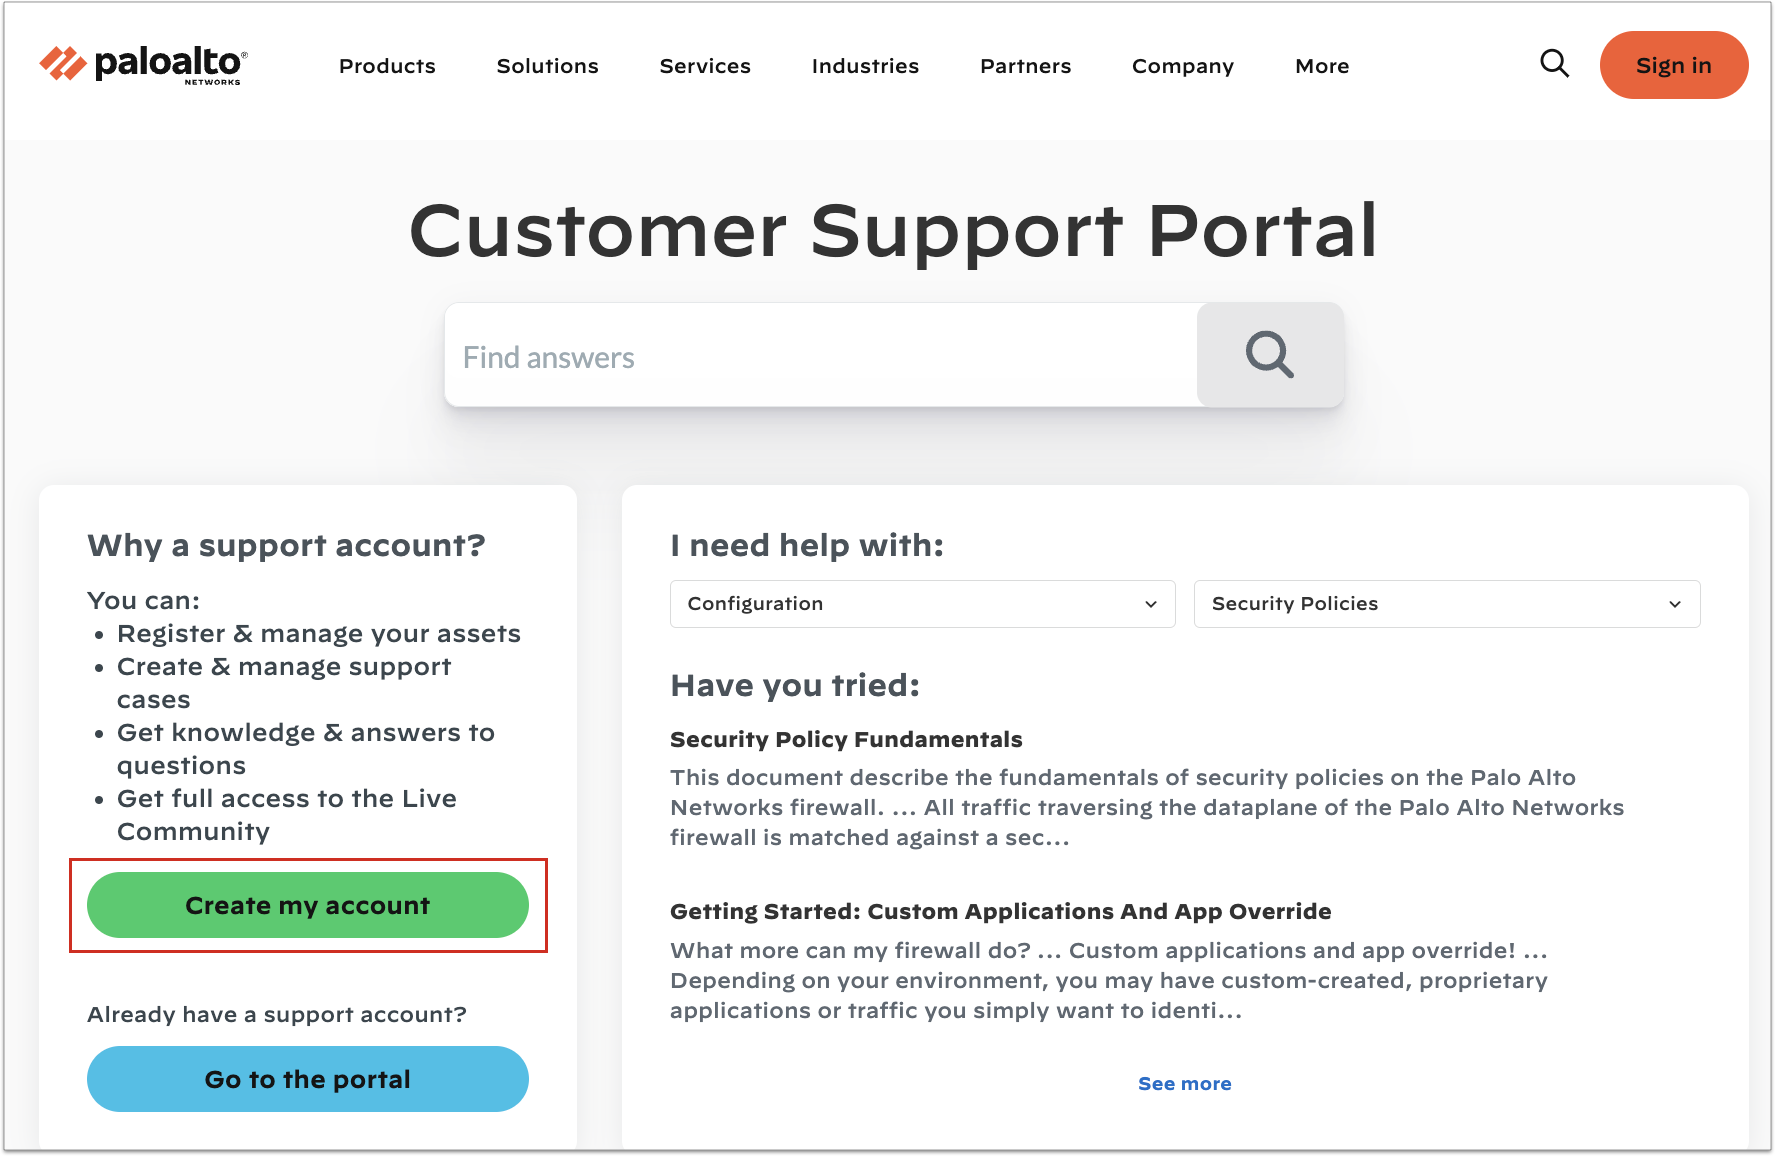
Go to https://support.paloaltonetworks.com and click Create my account button.
Step 2. Enter my email address
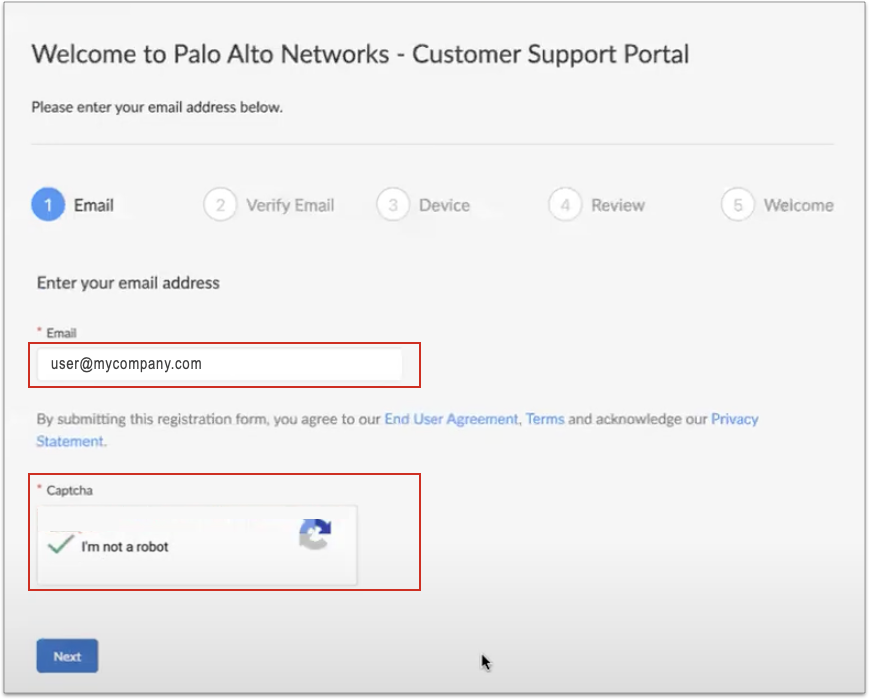
Enter your email address and respond to the Captcha. Click Next button.
Step 3. Authentic your email address
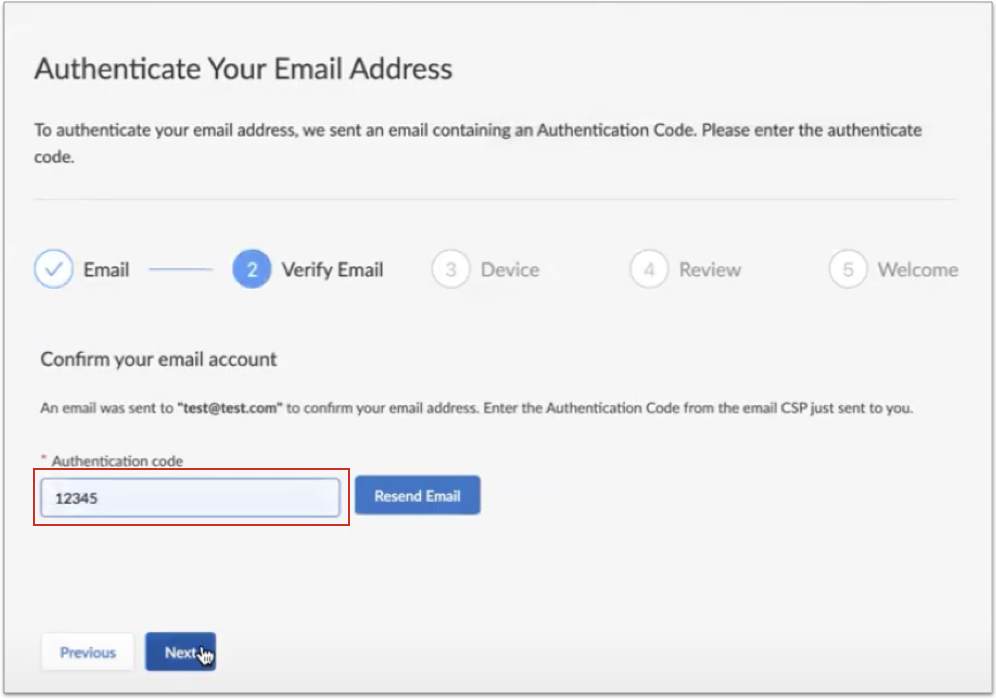
To authenticate your email address, CSP sends an Activation Code to your email inbox. Enter the Activation Code from the email, and click Next button.
Step 4. Register a product
Note: This step does not actually register the product. It uses the information from the order summary to tie the user to the correct CSP Account.
Select one of two options to register a product.
- Register product, e.g., hardware PA-Series firewalls, using Serial Number, Authorization Code, Customer ID, Parent Order Number
- Register usage-based VM-Series products purchased from sone of the following public cloud Marketplace or Cloud Security Service Provider (CSSP)
- Amazon Web Services (AWS)
- Microsoft Azure
- CSSP (Cloud Security Service Provider)
- Google Cloud Platform
- AWS Cloud NGFW (Cloud NGFW products)
- Azure Cloud NGFW (Cloud NGFW products)
If you purchased a Cloud NGFW from the AWS or Azure Cloud NGFW Marketplace, select one of the two Cloud NGFW options, depending on where you purchased the Cloud NGFW. Otherwise, select one of the other four VM-Series Marketplaces.
The sample screen below shows registration of a usage-based VM-Series product. Enter information for your product, e.g., tenant ID, serial number. Respond to the Captcha, and click Next button.
For physical or virtualized firewalls purchased through normal sales channels, select the first option "Register device using Serial Number, Authorization Code, Customer ID, Parent Order Number -- enter a device Serial Number, Auth Code, or Parent Order Number and Sales Order Number or Customer ID.
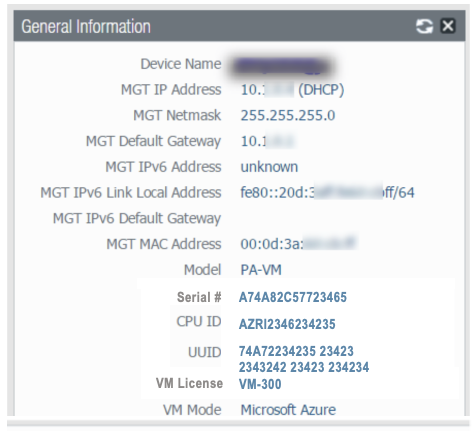
For VM-Series firewalls purchased directly from AWS, Azure, or Google Cloud Platform Marketplaces (PAYG) (but not the AWS and Azure Cloud NGFW Marketplaces), enter a Serial Number, CPU ID and (optional) UUID of the device being registered.
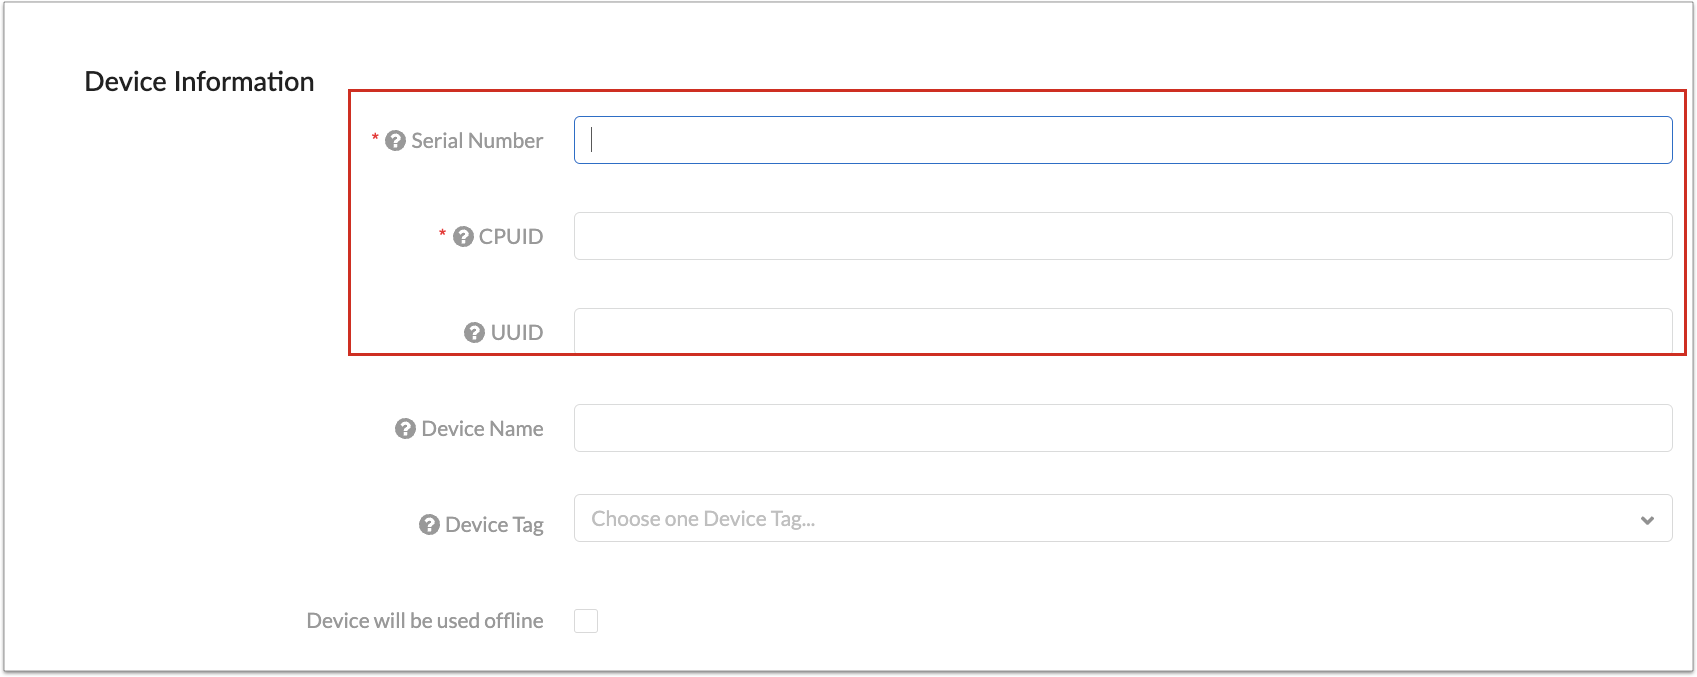
This Serial Number, CPU ID, and (optional) UUID can be found on the VM-Series web interface dashboard. See the sample screen from a Microsoft Azure VM-Series NGFW.
For evaluation assets, enter a Serial Number or Auth Code and Eval-ID. This data can be found in your Eval email.

If you purchased a PAYG license from a Marketplace and you do not have any other asset with a PANW order, you will need to create a support case to convert your Support account from Eval to Customer account. After the account conversion, register your PAYG VM in your CSP account.
How to create your CSP user account from XSOAR console? New users can register directly through the App. Both the user and super-user need to approve the registration. The new user receives a welcome email with activation and password setup link, the super user gets an email to accept or reject the new user.
Step 5. Your CSP account
Your Customer Support Portal (CSP) account.
- If you are not already a member of a CSP account, and want to create a new CSP account, enter your company name and address, followed by your contact information. Click Next button. See Screens 5.1.1, 5.1.2, 5.1.3, and 5.1.4.
- If you are already a member of one or more CSP accounts (your email address is already registered to one or more CSP accounts), CSP gives you a second option to use one of these CSP accounts. Select option Add me to existing Support account. See screens in 5.1.5.
- If you are not already a member of a CSP account, and want to be added to a CSP account, stop here and ask a CSP Super User of that CSP account to add you (see "How to use the account registration link).
- If you are being added to an existing CSP account, your request will be sent to a Super User of that CSP account. When access is granted, you'll receive an email notifying you access has been granted. You will then have the option to create a password and set up MFA (Multi-Factor Authentication).
Note: You cannot use Cortex XDR serial number to self-register to Customer Support Portal. Contact Support if you would like to self-register to activate Cortex XDR.Login to the CSP account and register your product in that CSP account.Screen 5.1.1. Enter company information
To create a CSP account, enter your company's information, and click Next button.
Screen 5.1.2. Enter your user information
Now, enter your user contact information. Click Verify Address button.
Screen 5.1.3. Verify your contact information
After you enter your contact information, CSP verifies your address against known good addresses. If one of the recommended addresses is a better match, select that address. Otherwise, click OK button.
Screen 5.1.4. Review your contact information
CSP then displays your contact information. Review your contact information. If necessary, click Edit button to review your contact information. When your data looks good, respond to Captcha, and click Register button.
Screens 5.1.5. You're already member of one or more CSP accounts, do you want to use one of these CSP accounts instead?
If you are already a member of one or more CSP accounts, and want to associate a newly purchased product with one of these accounts, select Add me to existing account. If you are not already a member of a CSP account, CSP will not display this option.
Click Support Account widget. CSP displays a drop-down list of your CSP accounts. Select an account. Click Next button
Review your contact information, edit this information if necessary. When your information is accurate, respond to Captcha and click Register button.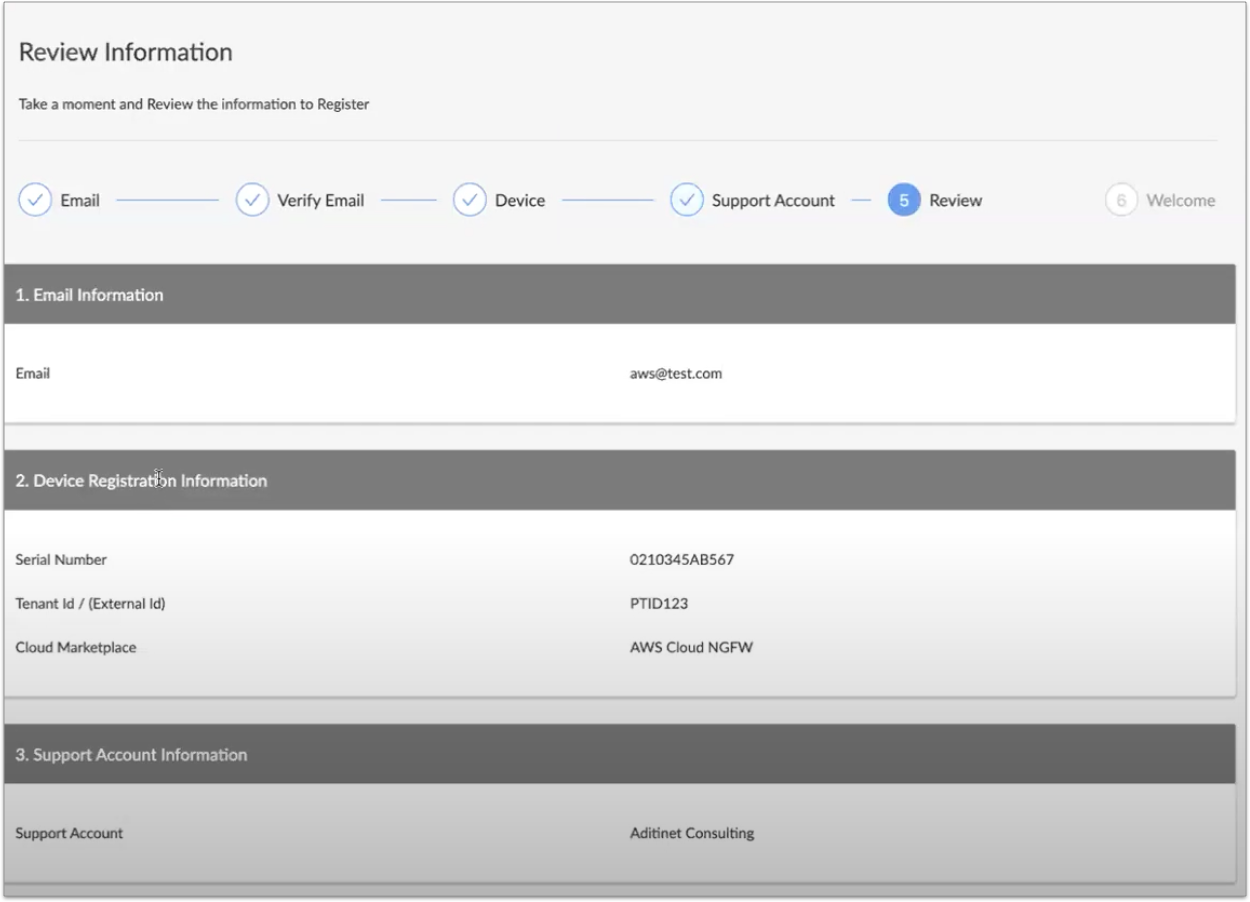
Step 6. Welcome to Customer Support Portal
Congratulations on creating your CSP account, or joining an existing CSP account. If you were added to an existing account, a Super User must first approve your membership in the CSP account. When approved, you will receive an email indicating how to login to CSP.
