How to Configure GlobalProtect using Pre-Logon in PAN-OS 9.0
30450
Created On 04/16/20 19:30 PM - Last Modified 04/22/20 19:19 PM
Objective
This document will discuss how to configure your GlobalProtect environment to use the Pre-Logon method within PAN-OS 9.0.
Environment
- PAN-OS 9.0
- Any Palo Alto Firewall.
- GlobalProtect Agent.
- Palo Alto Networks firewall configured with the Portal and Gateway using the same interface.
- All certificates are generated on the Palo Alto Networks firewall.
Procedure
- Generate your root CA, intermediate CA (optional), and server certificate on the firewall by navigating to Device > Certificate Management > Certificates and select Generate near the bottom of the window. This will open the Generate Certificate dialog box.
Note: For additional documentation regarding certificate management, please refer to this knowledge article.
Note: You should be able to see the full certificate chain after the generation stage is complete.
- Configure your TLS/SSL Profile by navigating to Device > Certificate Management > SSL/TLS Service Profile and selecting Add. This will populate the SSL/TLS Service Profile dialog box. Ensure that you are referencing the server certificate created in Step 1 for the Certificate field.
Note: For additional documentation regarding certificate management, please refer to this knowledge article.
- Create an Authentication Profile to by navigating to Device > Authentication Profile and selecting Add. This will populate the Authentication Profile dialog box.
Note: For this example we will be using local authentication only. For the full list of options and requirements, please refer to this knowledge article.
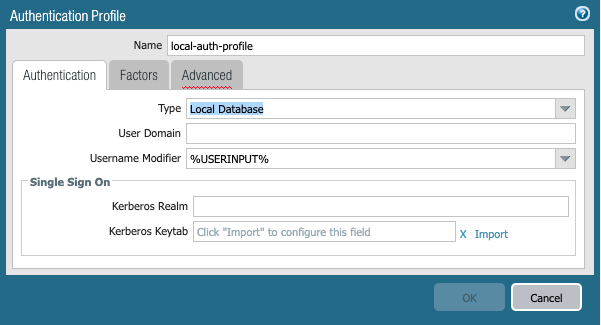
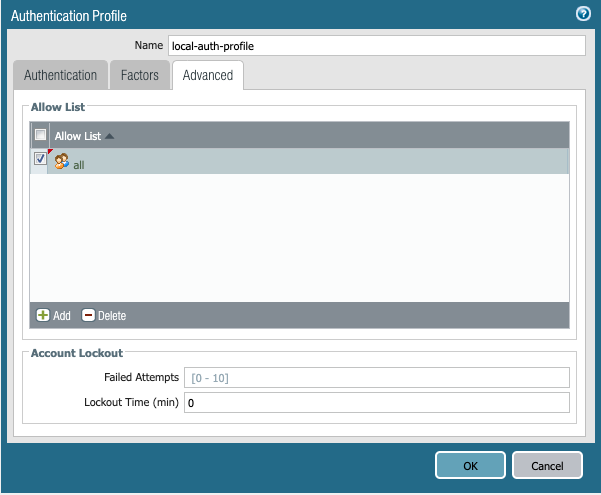
- Create your tunnel interface that GlobalProtect will use for external/internal Gateway connectivity by navigating to Network > Interfaces > Tunnel and selecting Add. This will populate the Tunnel Interface dialog box.
Note: Be sure to choose the appropriate Virtual Router and Security Zone. Best practices is to place the tunnel into its own Zone for better Security Policy control for the endpoints.
- Configure the GlobalProtect Portal by navigating to Network > GlobalProtect > Portals and select Add. This will populate the GlobalProtect Portal Configuration dialog box.
Note: For complete documentation regarding the GlobalProtect Portal configuration options, refer to the following knowledge article.
- Ensure that the SSL/TLS Service Profile used under the Authentication tab is the same as created in Step 2.
- Configure the Portal to use either a Client Authentication profile, Certificate Profile, or both for authentication purposes. For this example, the Client Authentication profile is used.
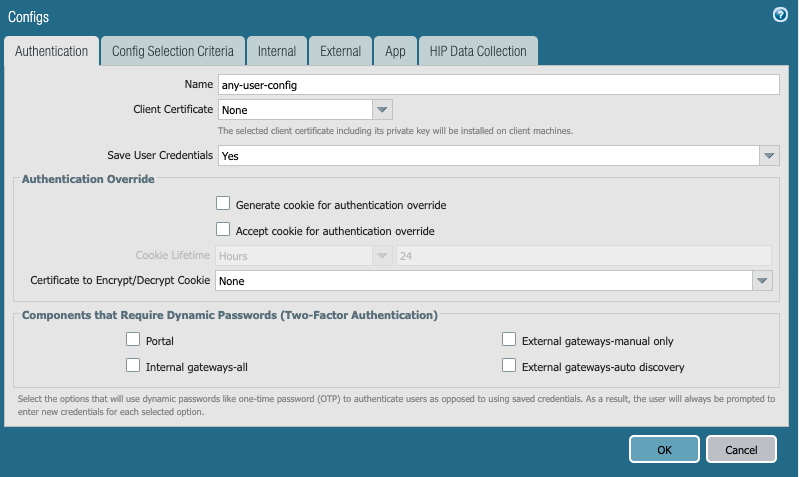
- Configure your client's Agent settings that will be pushed by the Portal under the Agent tab and selecting Add. This will populate the Agent's Config dialog box.
Note: If you'd like the clients to use different Gateways after logging on, be sure to create at least 2 configs; 1 for the "pre-logon" user and a second for after the user logs on. We will be using 2 separate configs in our example.
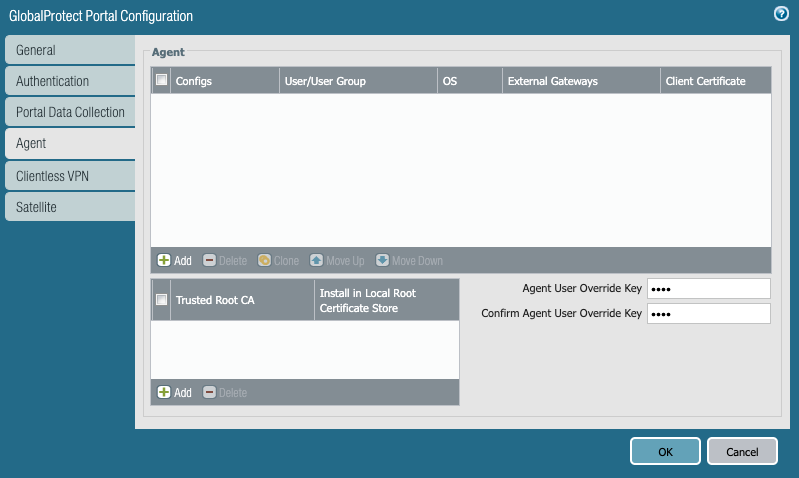
- Name your client's Agent configuration and configure other optional parameters as needed.
- On the Config Selection Criteria tab, select "pre-logon" from the User/User Group dropdown list.
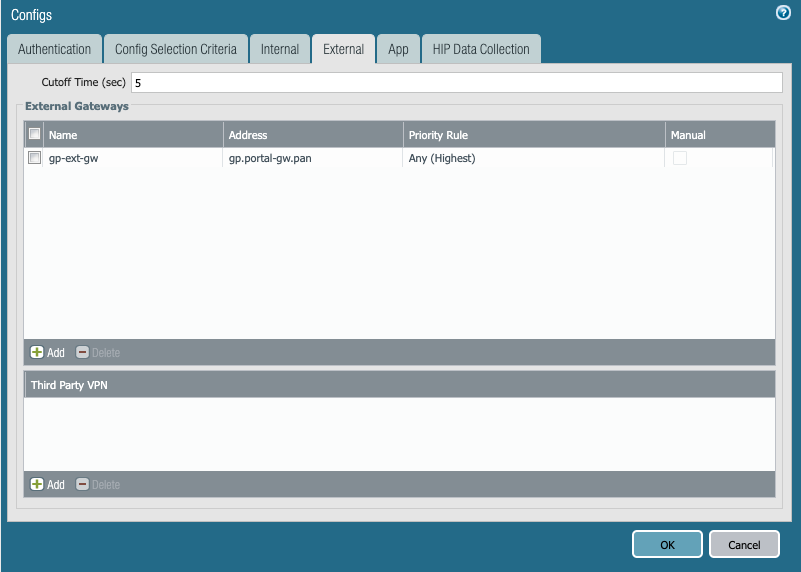
- On the External tab, select Add and configure the FQDN or IP address that will be used to access the Portal.
Note: It is best practice to use the FQDN whenever possible rather than the IP address.
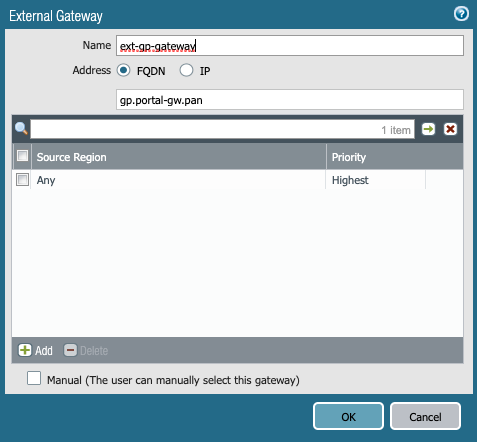
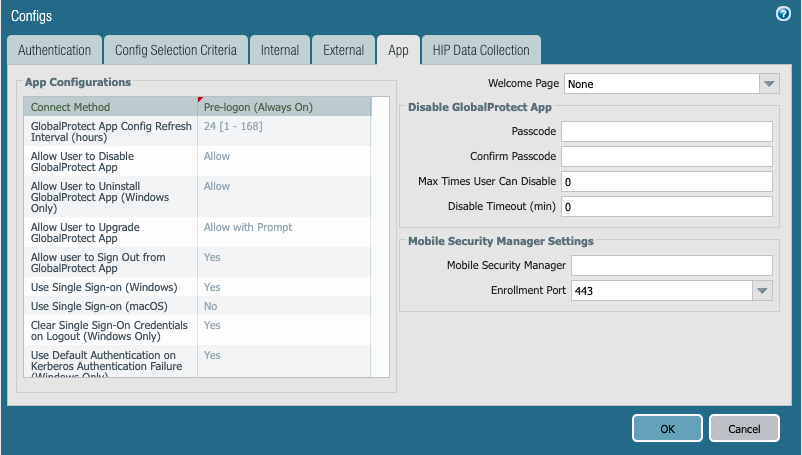
- On the App tab, configure the Connect Method to Pre-logon (Always On) and enable SSO (default for Windows) as needed.
- Select OK, and then repeat the same steps for the client configuration after pre-logon is complete.
Note: Confirm that the User/User Group value is set to Any for the second config and that SSO is enabled (this is recommended best practice to ensure accurate name reporting immediately after user login.)
- Select OK, and then select the necessary root and intermediate (if configured) CA certificates that will be pushed down by the Portal for authentication purposes under the Trusted Root CA section.
- Configure the GlobalProtect Gateway by navigating to Network > GlobalProtect > Gateways and selecting Add. This will populate the GlobalProtect Gateway Configuration dialog box.
Note: For full documentation regarding the GlobalProtect Gateway configuration, please refer to the following knowledge article.
- On the Authentication tab, configure the SSL/TLS profile configured in Step 2 for the server certificate and the client's authentication profile.
- On the Agent tab, select the checkbox next to Tunnel Mode to enable the use of tunnel interfaces and then select the tunnel interface created in Step 1 from the dropdown menu.
(Optional: Select the checkbox next to Enable IPSec to enable the use of IPSec)
Note: It is recommended to use IPSec for max throughput capabilities. If IPSec fails to connect, the firewall will fallback to using SSL by default (is UDP 4501 traffic allowed?)

Note: It is recommended to use IPSec for max throughput capabilities. If IPSec fails to connect, the firewall will fallback to using SSL by default (is UDP 4501 traffic allowed?)
- On the Client Settings tab, select Add to populate the Configs dialog box.
- Choose the IP Pools tab and configure the start and end IP address to be used by connected clients under IP Pool and then select OK when finished.
Note: Do not configure an IP range under the Agent's Client IP Pool tab if you configured a pool under the Client Settings tab.
- (Optional) Define the subnets the clients are allowed/denied access once connected by enabling split tunneling under the Split Tunnel tab.
- (Optional) Disable access to the local resources also for clients connecting to GlobalProtect by selecting the checkbox next to No direct access to local network under the Split Tunnel tab.
- Click OK and finally Commit the configuration. The Pre-logon configuration is now complete.
Additional Information
For additional information regarding the full configuration of GlobalProtect and its related components, please refer to the following links:
Remote Access VPN with Pre-Logon
GlobalProtect Certificate Best Practices.
Configuring an Authentication Profile.