How to Change the Include and Exclude Lists with User-ID Agent 4.1
22683
Created On 09/25/18 19:54 PM - Last Modified 06/08/23 09:54 AM
Resolution
Previous versions of the User-ID software had separate lists for included and excluded networks. User-ID 4.1 now has both lists merged into a single list.
This list is evaluated from the top down and in case of contradictions, the include list will take precedence and for that reason, in most cases, the exclude list needs to be on top.
If the include list is on top, if first needs to be deleted and re-added at the bottom of the exclude list.
For cases where the include list is large, the XML file can be edited and the exclude list can be cut from the bottom and pasted at the top of the list.
Here is the procedure for how to make that modification:
- Open the file UserIDAgentConfig.xml which is usually in the C:\Program Files\Palo Alto Networks\User-ID Agent folder
- Save the file with a new name as a backup.
- Search for <include-exclude-settings>
- The list will include both included and excluded items. Use cut and paste to move excluded entries to the top.
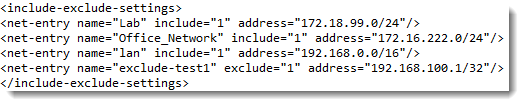
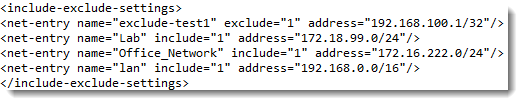
Here is a before and after example:
Before
After
- Save the changes
- Close and re-open the User-ID agent window
- At this point, a commit is required but the button will be grayed out since no changes were made via the GUI. Another configuration can be made to activate the commit button, or a "dummy" entry can be added to the include/exclude list to enable the commit button
- Commit the changes
- If a dummy entry was added, remove it and commit again
owner: yogihara