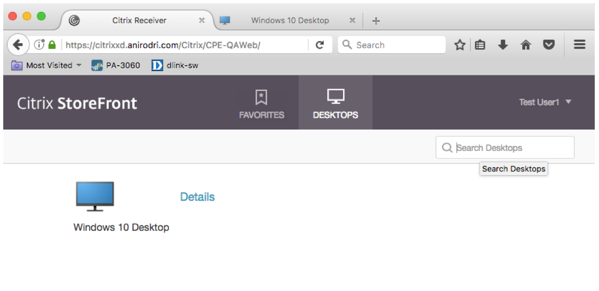
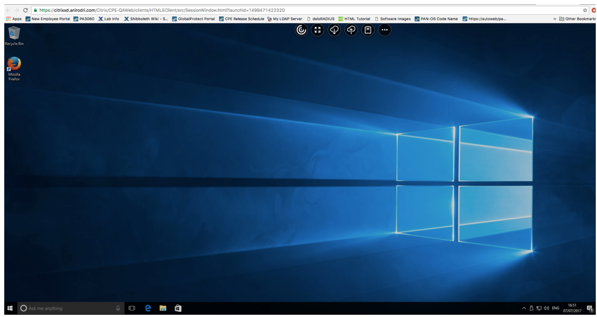
GlobalProtect Clientless VPN supports access to remote desktops (RDPs), VNC or SSH. This document provides information on how you can enable your existing Citrix deployment to provide support for RDP through GlobalProtect Clientless VPN.
To enable users to access the Citrix environment securely and remotely through GlobalProtect Clientless VPN, Citrix deployment should be configured to support HTML5 based Receiver. HTML5 based receiver uses secure websockets for remote connection to Virtual Delivery Agents (VDAs). This allows the users to access the published desktops and applications from a browser and do not need to install any additional plugins or software on the user's machine.
Receiver for HTML5 is only supported with HTML5 capable browsers. For unsupported browsers, the connection will fall back to the traditional Receiver if configured in Storefront. For more detailed setup guide and support contact Citrix Support Team.
Steps to configure Citrix Receiver for HTML5:
- Enable SSL support on the VDA
- Enable Receiver for HTML5 in Storefront
- Configure the delivery controller to enable websockets
- Enable SSL on the delivery controller
Enable SSL support on VDA
- Obtain an SSL Server certificate for all your VDAs. A certificate issue by a trusted third-party root CA is recommended, however a self-signed certificate can also be used.
- Install the certificate in the Computer certificate store (not the user store). If the local certificate store on the VDA is used to generate a CSR, ensure that the private key is marked exportable. If a pkcs12 is used to install certificates, ensure that keys are marked exportable during pkcs12 import.
Once the certificate is installed, it must indicate that certificate private key is available
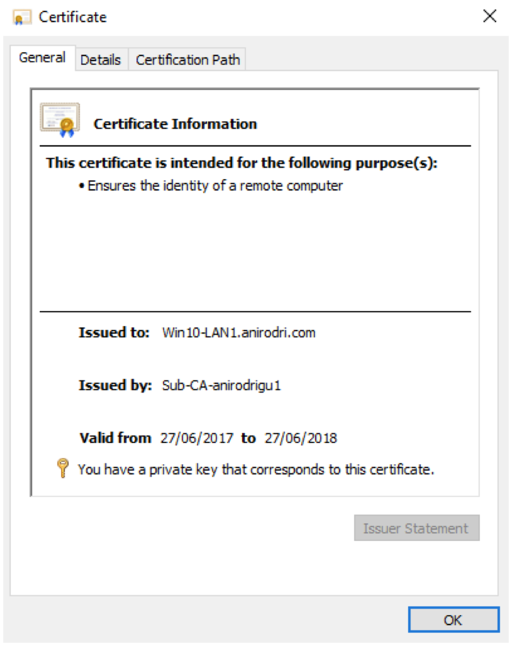
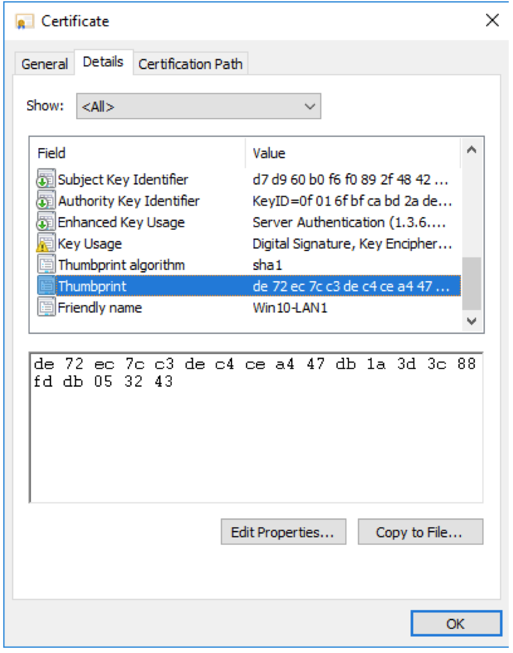
- Note down the certificate thumbprint, as it will be used to associate the certificate with the VDA
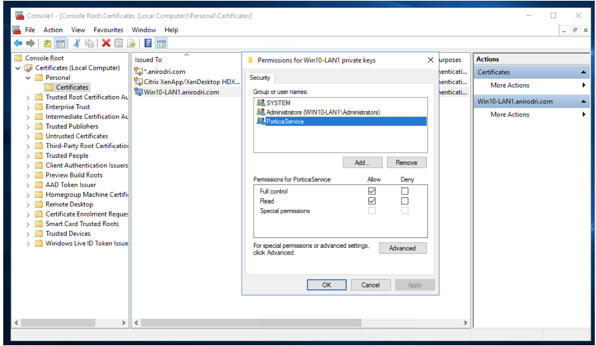
- Once the certificate is installed, navigate to 'Manage private keys' and allow full control and read permissions for ‘PorticaService’.
This service can be added by searching for 'NT SERVICE\PorticaService' under the computer directory (not under the domain)
- Open registry editor on Windows and edit the following registry:
HKLM\System\CurrentControlSet\Control\TerminalServer\Wds\icawd
At this registry, you need to complete two steps:
- Edit the binary value of 'SSLThumbprint' and manually type the thumbprint saved from step 3
- Change the DWORD value of SSLEnabled to 1 (from 0)

Enable Receiver for HTML5
- Navigate to Citrix Storefront from Citrix Studio Console
- Under Stores, click on the Receiver for Web Sites tab
- On the right, select 'Manage Receiver for Web Sites'
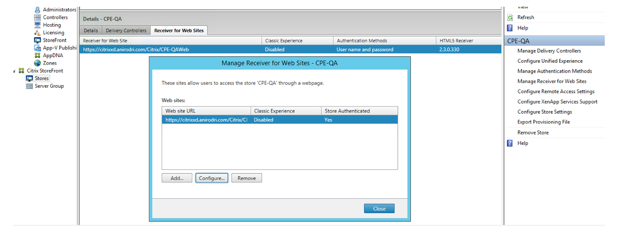
- Select the appropriate entry that shows up, and click on Configure
- In the configuration wizard, click on 'Deploy Citrix Receiver'. On this page, you can select either of the two deployment options:
- Use Receiver for HTML5 if local Receiver is unavailable
- Always use Receiver for HTML5
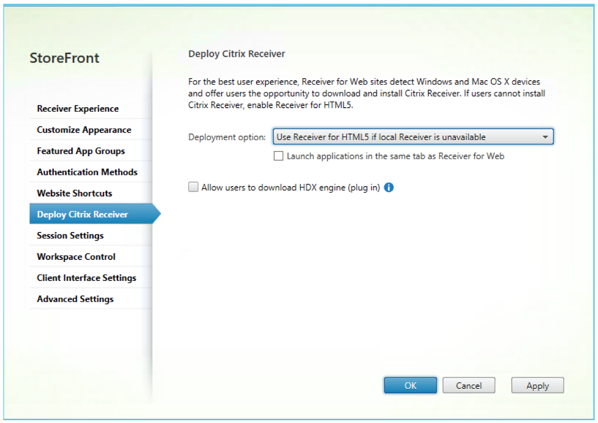
- Click Apply and Exit
Configure the Delivery Controller for Websockets
- Under Citrix Studio, navigate to Policies.
- Click on 'Create Policy' on a right. Avoid editing the default policy - Unfiltered
- In the create policy wizard, search for 'websocket' on the Settings page
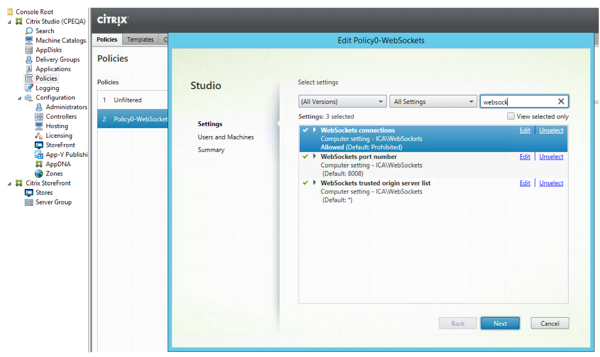
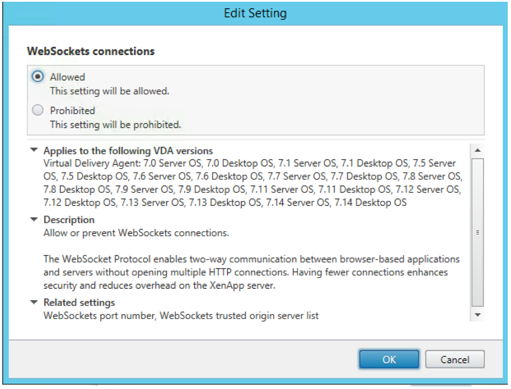
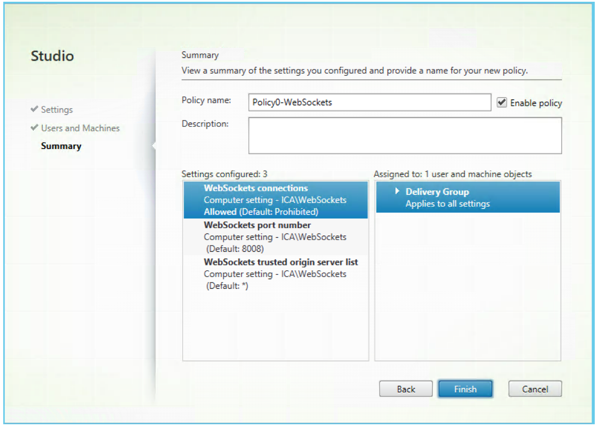
- Click on Edit across 'WebSockets connections and select 'Allowed'. Click Ok
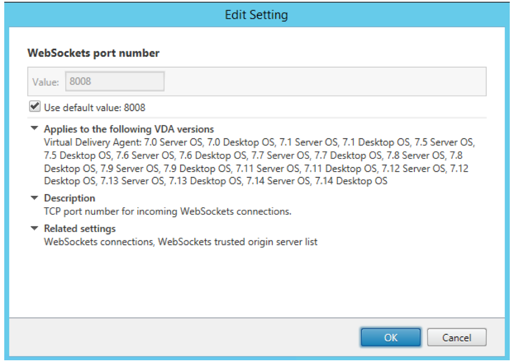
- Similarly, edit WebSockets port number and use value 8008. You can also check the box that says Use default value:8008
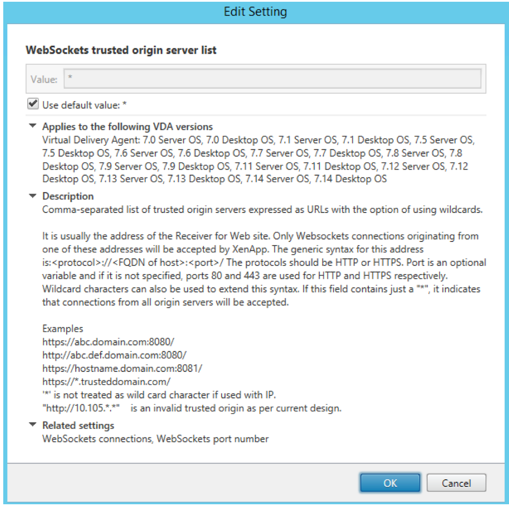
- Next, edit Websockets trusted origin server list and use a value of '*'
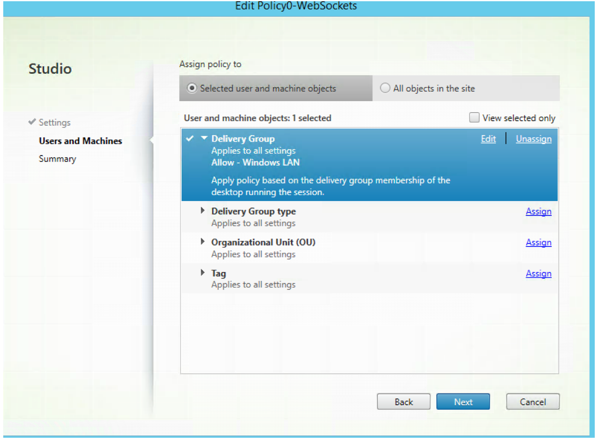
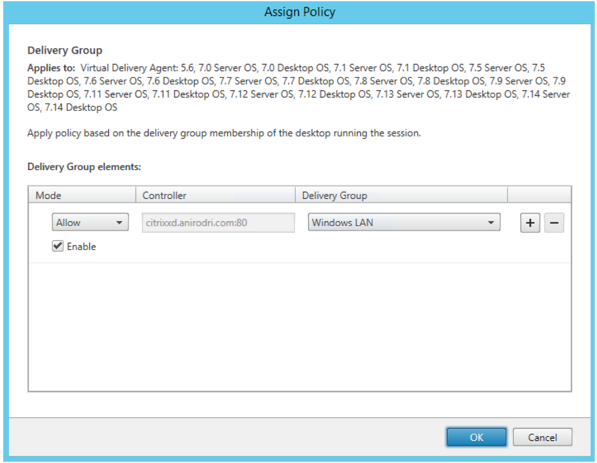
- On the next page, assign this policy to the appropriate delivery group that was initially created.
- Finally, provide a name for the policy and check the 'Enable policy' box
Enable SSL on the delivery controller server
- Open Windows PowerShell as an Administrator
- Enter the following commands one at a time
Asnp citrix.*
Get-BrokerAccessPolicyRule –DesktopGroupName ‘GROUPNAME’ | Set-BrokerAccessPolicyRule –HdxSslEnabled $true
Set-BrokerSite –DnsResolutionEnabled $true
At this point Receiver for HTML5 should be enabled. When users navigate to Storefront URL, they should see two options on the webpage. An option to install the traditional Receiver, or an option to use the light version (HTML5 version).
Choosing the light version will take them to a logon screen, where they can authenticate using their AD credentials and access published desktops or applications.
User experience when using Citrix Receiver for HTML5
