How to Configure Captive Portal with OKTA SAML SSO - Prisma Access
38649
Created On 06/18/21 21:33 PM - Last Modified 09/01/21 22:35 PM
Objective
- This article is designed to help with base configuration and considerations when configuring Captive Portal for Prisma Access
- We will cover configuration for HTTPS and non-HTTPS services such as RDP and SSH, using SAML IDP for authentication
Environment
- Captive Portal
- Global Protect - All supported versions
- Prisma Access Mobile Users
- Panorama PanOS - All support versions
Procedure
Table of Contents
-
Pre-Requisite Requirements
-
Captive Portal for HTTP/HTTPS Applications
-
Captive Portal for Non-HTTP/HTTPS Applications
Pre-requisite Requirements
Prior to starting this procedure please have the following:- Deployed Mobile Users with Portal and Gateway Setup
- Ensure Decryption is successfully deployed in your environment, this is a requirement for CP
- The firewall makes use of a 302 HTTP message to redirect the user to the Captive Portal destination page and subsequently the IDP
- Pre-configure an SSL/TLS Profile with a valid certificate for your Captive Portal IP/FQDN: Reference Link
- To avoid issues with Untrusted redirection pages ensure the signing CA for your Captive Portal certificate and your decryption certificate are installed on the user's workstations: Reference Link
Captive Portal for HTTP/HTTPS Applications
Staging the Captive Portal
Note: For simplicity we will be using self-signed certificates and IP addressing instead of FQDN for the CP Redirect Host
Step 1. Navigate to Panorama > Cloud Services > Status > Network Details
- Under the Radio bubble "Service Infrastructure" make note of your Captive Portal Redirect IP address
Step 2. Next Navigate to your OKTA portal
- Go to Applications > Browse App Integration Catalog
- Search for Palo Alto Networks - Captive Portal and add the application
Step 3. After adding the application, next specify the Base URL
- After successful auth this will be where the user will be redirected to
- Your Base URL will be your Captive Portal IP/FQDN along with the CP Default Port
- Select Done
Step 4. Next Export the IDP Metadata

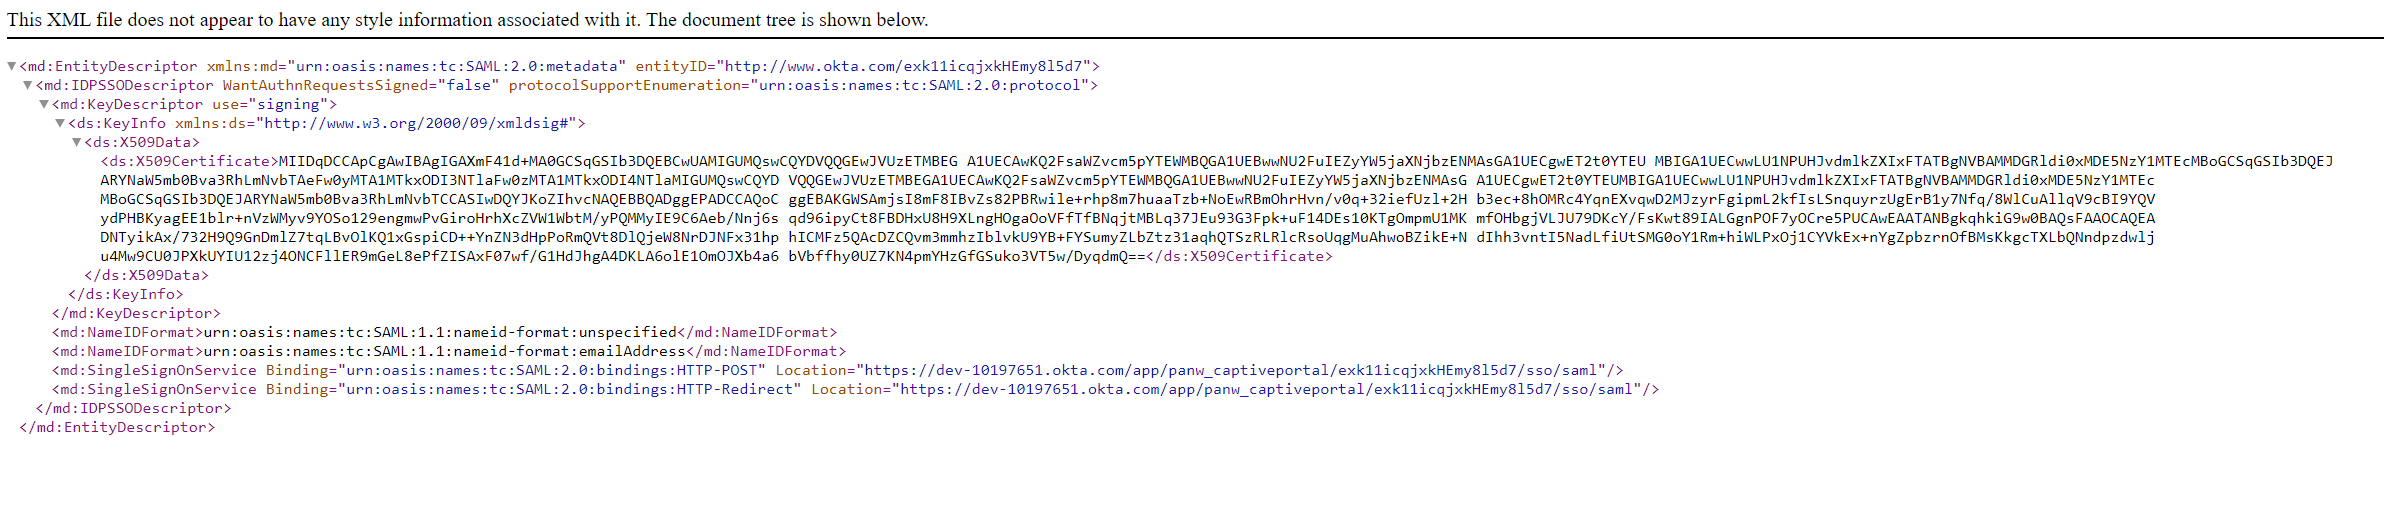
Step 5. Navigate back to Panorama under Device > Mobile User's Template > Server Profiles > SAML Identity Provider and Select "Import" on the bottom left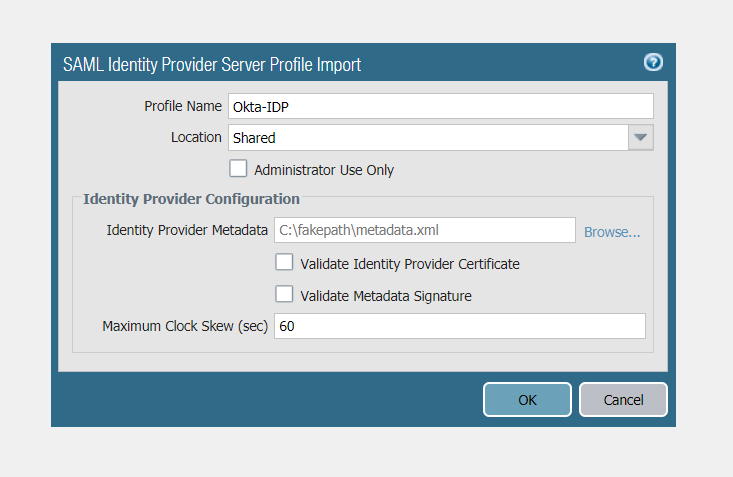
Note: This should automatically import the necessary IDP certificates and create the SAML IDP configuration
Step 6. Next Navigate to Device > Mobile User's Template > Authentication Profile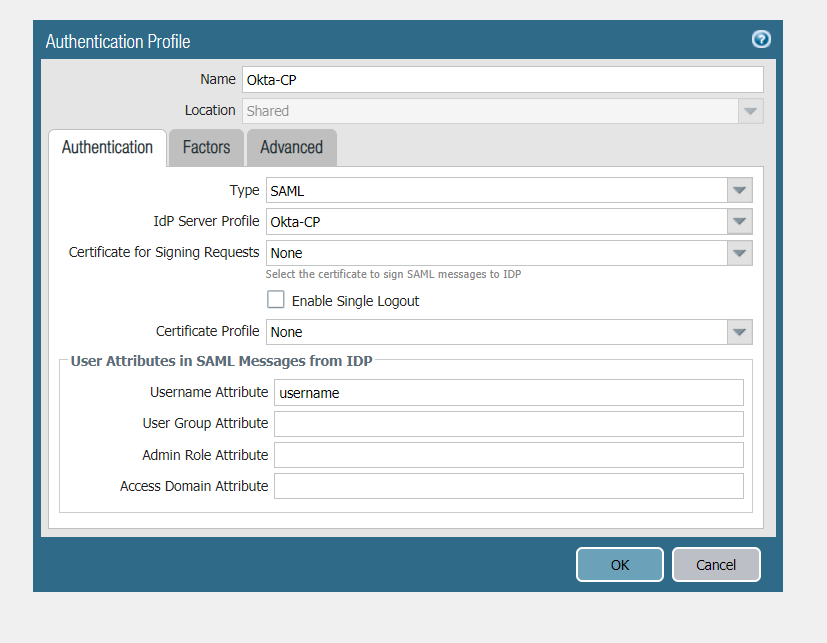
Step 1. Navigate to Device > Mobile User's Template > User Identification > Captive Portal Settings
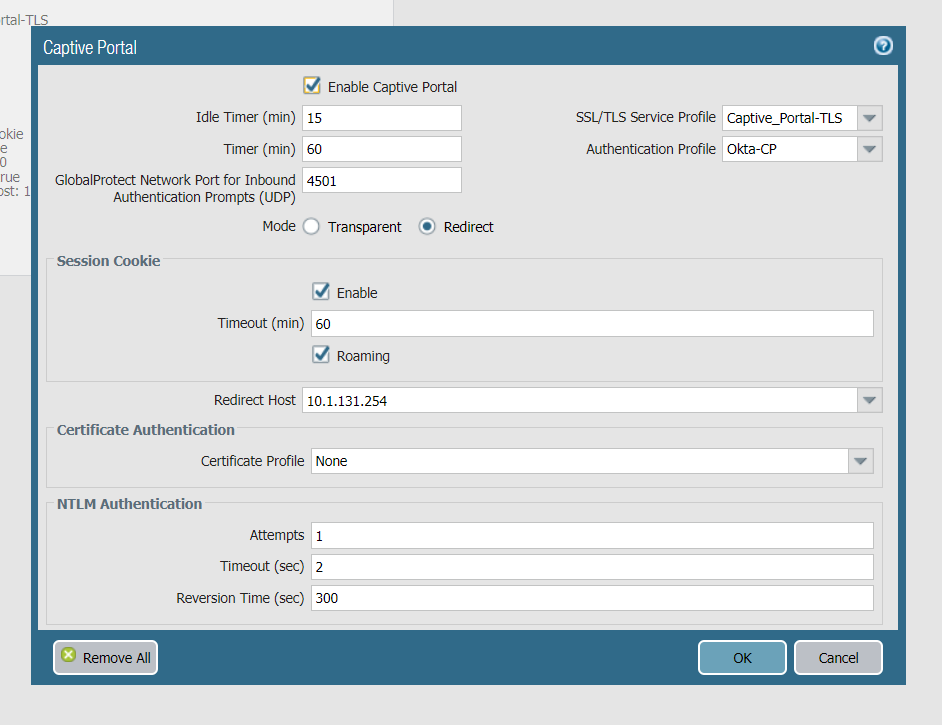
<Note: Please see Caveats section related to SAML SSO with session cookies for more information on this setting
------------------------------------------------------------------------------------------------------------------------
Step 1. Configure the Authentication Object
--------------------------------------------------------------------------------------------------------------------------------------
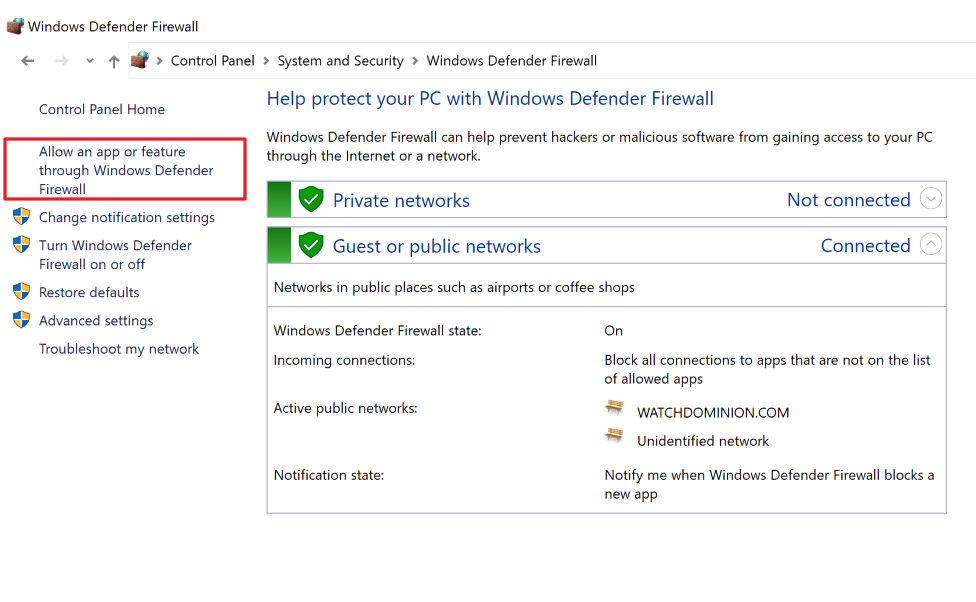
Step 1. Navigate to Control Panel > System and Security > Windows Defender Firewall and select "Allow an app or feature through Windows Defender Firewall"
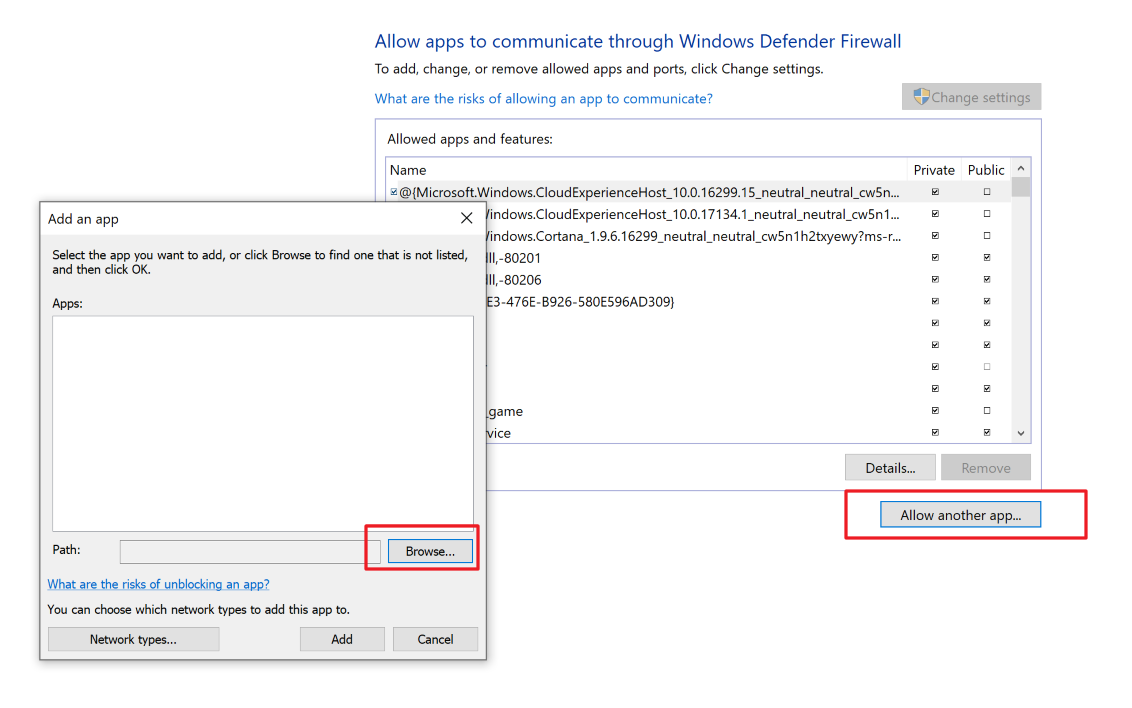
Step 2. On the next page select "Allow another app" and select "Browse"
Step 3. Navigate to C:\Program Files|Palo Alto Networks\GlobalProtect then, add both PanGPA and PanGPS applications
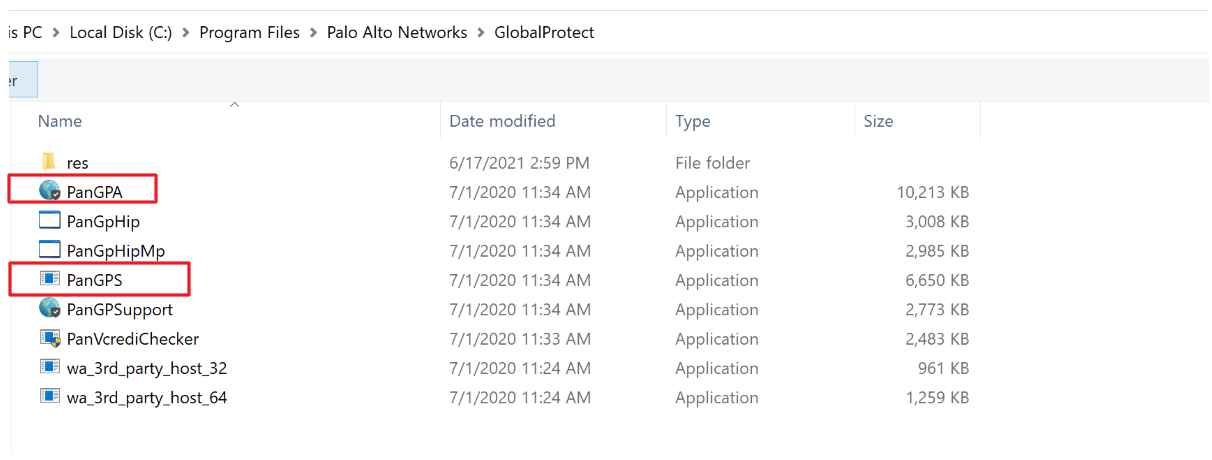
Step 4. Once added find "Global Protect client" and "Global Protect service" from the list and check the private/public checkbox
------------------------------------------------------------------

- In the App go to the Sign-on Tab, and Select the "Identity Provider metadata" Link
- A secondary tab should open in your browser, right click and save as
- We will use this metadata file to create the SAML IDP Server Profile
Step 5. Navigate back to Panorama under Device > Mobile User's Template > Server Profiles > SAML Identity Provider and Select "Import" on the bottom left
- Browse and import the metadata file
- To simplify the process, we will unselect "Validate Identity Provider Certificate"
- Select OK
Note: This should automatically import the necessary IDP certificates and create the SAML IDP configuration
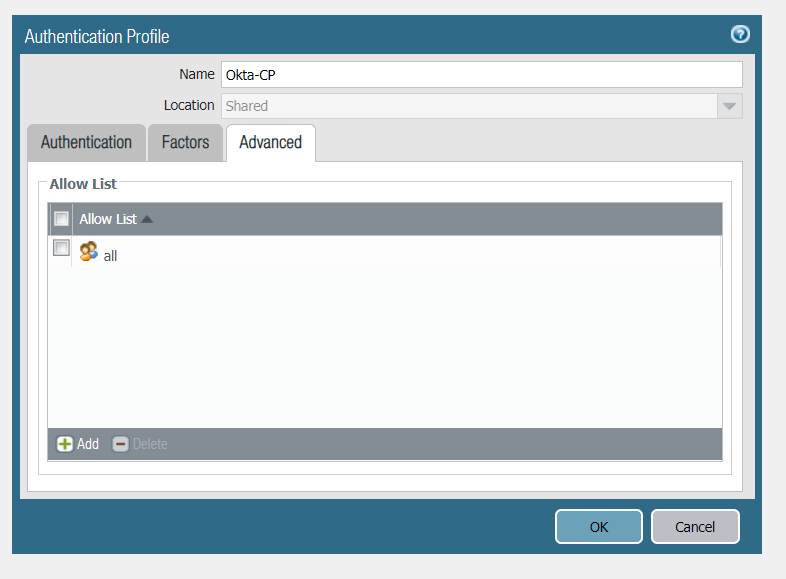
Step 6. Next Navigate to Device > Mobile User's Template > Authentication Profile
- Select Add and Configure the following
- Type: SAML
- IdP Server Profile: <Your SAML IDP Server Profile created in Step 5>
- We will leave the rest blank for the purpose of this doc
- Select OK and Commit to Panorama
Configuring the Captive Portal
Now that we have pre-staged our authentication method, we will move forward with the Captive Portal configurationStep 1. Navigate to Device > Mobile User's Template > User Identification > Captive Portal Settings
- Select the Gear Icon and Specify
- SSL/TLS Profile: <Profile the CP will use for TLS communication>
- Authentication Profile: <The Auth Profile CP will use>
- Mode: Redirect
- Redirect Host: Specify your Service Infrastructure Captive Portal IP or resolvable FQDN where the Firewall will redirect the user to
- Select Okay and commit to Panorama
<Note: Please see Caveats section related to SAML SSO with session cookies for more information on this setting
------------------------------------------------------------------------------------------------------------------------
Authentication Policies and Objects
Step 1. Configure the Authentication Object
- Navigate to Objects > Mobile User's Device Group > Authentication then Select Add and Specify:
- Authentication Method: web-form
- Authentication Profile: <SAML Authentication Profile>
- Select OK when done
Step 2. Next we will configure the Authentication Policy for HTTP/HTTPS based resources
------------------------------------------------------------------------------------------------------------------------
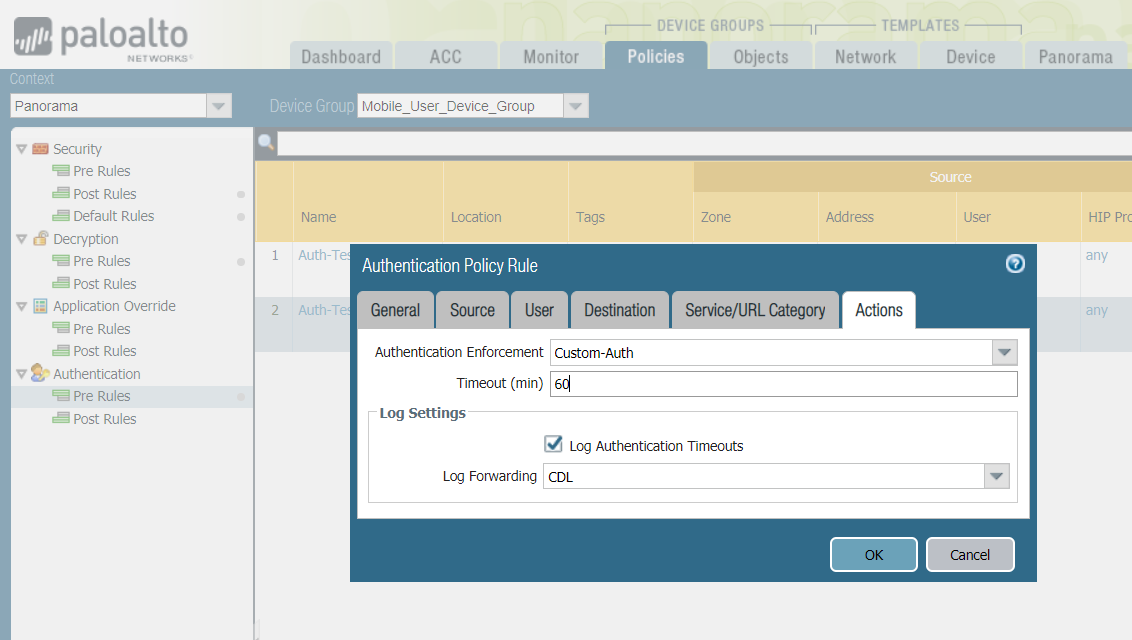
- Navigate to Policies > Mobile User's Device Group > Authentication > Add a Policy and Specify:
- Source/Destination tab: <IP/Zones for this policy>
- Service: service-http and service https
- URL Category: <URL's that require CP>
- Actions:
- Authentication Enforcement: <Specify your custom auth object>
- Timeout: Specify a timeout before the user must authenticate again
- Select OK and commit to Panorama
- When ready push the configuration to Mobile Users
Test the Setup
For this example, I am testing accessing another FW connected to a service connection within my MU's Region--------------------------------------------------------------------------------------------------------------------------------------
Captive Portal for Non-HTTP/HTTPS Applications
MFA Prompt Consideration with Windows
- For non-https applications to achieve the goal of authentication GP will forward an MFA prompt using UDP on port 4501 from the Connected Gateway Tunnel IP
- Please ensure Windows Firewall's are disabled or allow this inbound connection for MFA pop-up
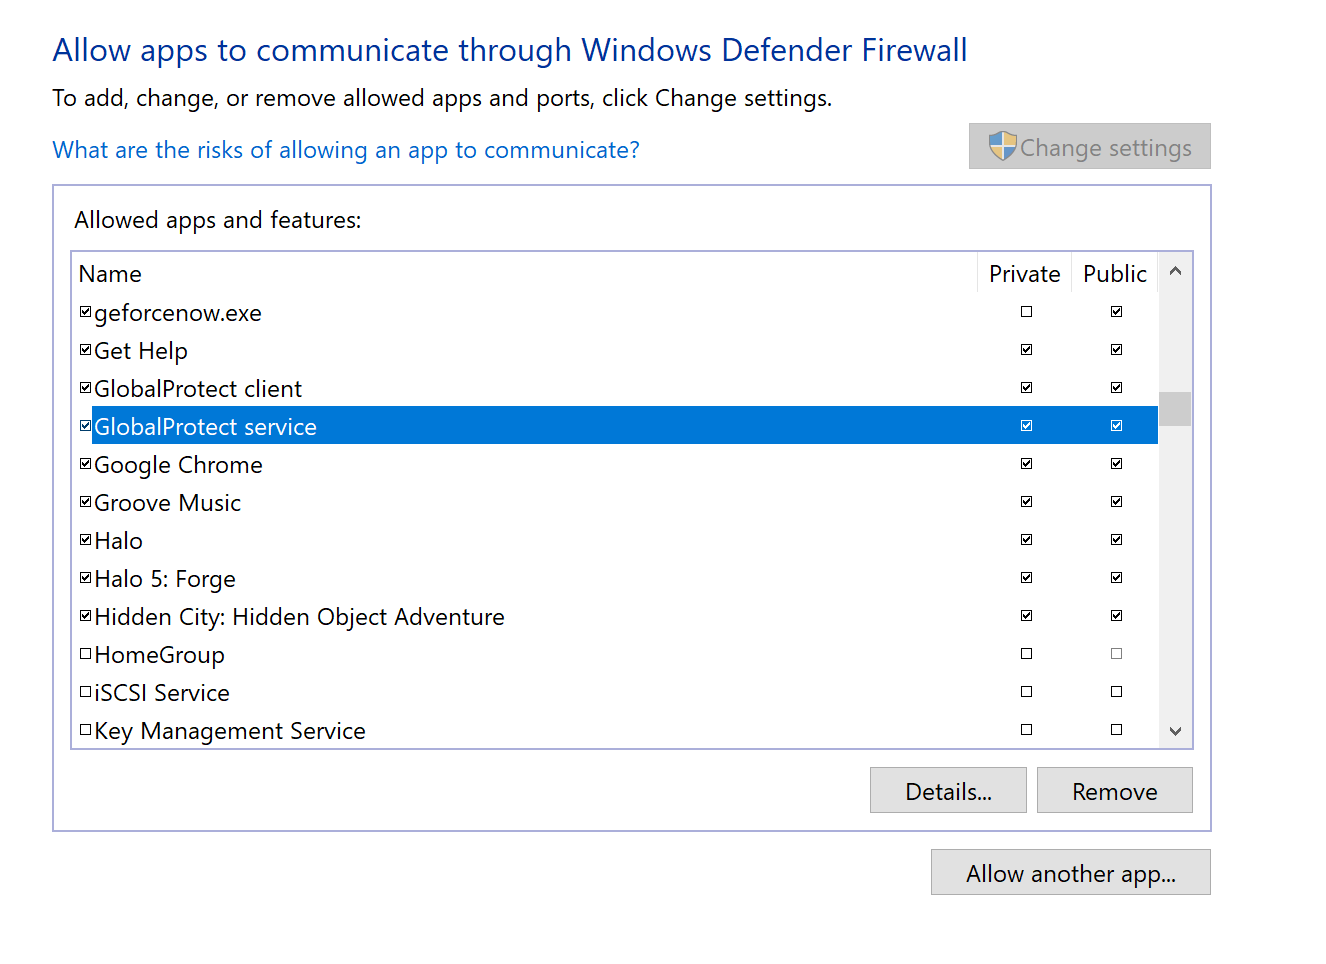
Step 1. Navigate to Control Panel > System and Security > Windows Defender Firewall and select "Allow an app or feature through Windows Defender Firewall"
Step 2. On the next page select "Allow another app" and select "Browse"
Step 3. Navigate to C:\Program Files|Palo Alto Networks\GlobalProtect then, add both PanGPA and PanGPS applications
Step 4. Once added find "Global Protect client" and "Global Protect service" from the list and check the private/public checkbox
- Select OK when done and apply the settings
------------------------------------------------------------------
Configuration
Note: Please reference the previous configuration sections to Setup CP, Authentication Profiles and Authentication Policies and Objects if only configuring non-HTTPS apps
Step 1. Create a Captive Portal Policy for the service that needs restriction, for this example we'll be testing SSH
Step 2. Navigate to the network tab > Portals and select your GP Portal
Step 3. Next Navigate to Agent Tab > (your agent-config) > App Tab
Change the following:
- Enable Inbound Authentication prompts from MFA Gateways: Set to Yes
- Trusted MFA gateways: Specify your Captive Portal IP/FQDN along with the CP Port
- Select OK and commit to Panorama
- When ready push to Mobile Users
Step 4. Test the Setup
- SSH to the resource and you should receive a pop-up
--------------------------------------------------------------------------------------------------------------------
Caveats
-
Authentication Objects
- Custom Authentication objects are mandatory for SAML SSO redirection
- Using the default-web form object will not trigger the Captive Portal Redirection to occur when using SAML SSO
- The default web-form object is intended for authentication where the firewall is handling the credentials, this is not compatible with SAML SSO
-
Authentication Policy Timeout
- With SAML SSO, the authentication re-prompting relies on authentication timestamps
- A user will not be repromoted to authenticate to a resource until the timeout timeframe in the matched policy has elapsed
- It is important to note once a user has authenticated once, all policies with the same authentication method will not trigger unless the timestamp exceeds that policies timeout value.
- For example
- Policy A has timeout of 1 hour
- Policy B has timeout of 8 hours
- If the user triggers Policy B, the authentication timestamp will be logged and the user will be able to access the resources in both policy A and B without reauthentication
- If after 2 hours the user initiates a new connection to Policy A resource, Captive Portal will trigger as the timeout value has exceeded Policy A's value
-
Captive Portal Session Cookie
- Session Cookies are applicable to other forms of authentication where the Firewall is handling the user's credentials such as LDAP with MFA factor
- This will save a cache entry for the user along with a TTL value for the session cookie timeout
- Once the TTL hits 0 the firewall will prompt when a user matches the policy
- The firewall will not create a session cookie for SAML SSO authentications