Migrate a Multi-vSYS enabled Firewall HA Pair to Panorama Management
69468
Created On 11/29/18 09:59 AM - Last Modified 08/03/20 18:30 PM
Symptom
When importing multi-vSYS enabled HA peers to Panorama the second HA peer importing step fails due to error:
Example below:
Operation Import
Status Completed
Result Failed
Details
- Device: 001701010233
- Template: Lab80-249-PA-3050
- Device group : Custom
- Options: Import objects as shared if possible
- Failed to add imported nodes from device to Panorama. Validation failed.
Environment
- PAN-OS 8.0 and above.
- Palo Alto Firewall.
- Any Panorama.
Cause
This error is caused by duplicate vSYS naming as the Panorama will create a template for each vSYS and will return validation failure as the vsys name already exist.
configd debug log provides this information :
> less mp-log configd.log

2018-11-29 01:26:58.223 -0800 debug: pan_jobmgr_process_job(pan_job_mgr.c:2953): device configuration import job was successful
2018-11-29 01:26:58.223 -0800 Error:  pan_cfg_validate_config_import(pan_cfg_config_import_handler.c:3101):
                         device group devices/entry[@name='localhost.localdomain']/device-group/entry[@name='vsys-1'] already exists   <========
2018-11-29 01:26:58.223 -0800 Error:  pan_cfg_device_config_import_fini(pan_cfg_config_import_handler.c:3750):
                         Failed to add imported nodes from device to Panorama. Validation failed.
Resolution
Step 1:
- Disable configuration synchronization between the HA peers.
Note: Repeat these steps for both firewalls in the HA pair.
- Log in to the web interface on each firewall, select and edit the Setup section.
- Clear Enable Config Sync and click OK.
- Commit the configuration changes on each firewall.
Step 2:
- Connect each firewall to Panorama.
- Log in to the web interface on each firewall, select and edit the Panorama Settings.
- In the Panorama Servers fields, enter the IP addresses of the Panorama management servers, confirm Panorama Policy and Objects and Device and Network Template are enabled and select OK.
- Commit the configuration changes on each firewall.
Step 3:
- Add each firewall as a managed device
- Log in to Panorama, select and click Add.
- Enter the serial number of each firewall and click OK.
- Select and Commit your changes.
- Verify that the Device State for each firewall is Connected.
Note: You should have one entry per vSYS ( Below example 5 vSYS per firewall )
Step 4:
- Import device group & template configuration from HA peer-1 only to Panorama.
Note: The order does not matter you can either start importing Active on this step and then import Passive or the opposite.
- From Panorama, select , click Import device configuration to Panorama and select the Device.
- Select and Commit your changes.
- Push the configuration to the firewall imported in step 4.
- In Panorama, select and select Export or push device config bundle.
- Select the Device, select OK and Push & Commit.
- Select OK after the export has completed successfully.
- Push to Devices the device group and template configuration to the firewall selected in step 4 only.
- Select , and verify that the device group and template are in sync for the firewall.
Note: If this step was successful the view should be as below screenshot:
Step 6:
- Delete the Device Groups imported in step 4 then import HA-peer-2 device group and template configuration to Panorama.
- In Panorama select Panorama > Device Groups and select the device groups related to HA-peer-1 ( No need to Commit to Panorama )
- From Panorama, select , click Import device configuration to Panorama, and select the second device.
- Select and Commit your changes.
- Push the configuration to the firewall imported in step 6.
- In Panorama, select and select Export or push device config bundle.
- Select the Device, select OK and Push & Commit.
Step 8:
- Associate HA peer-1 and HA peer-2 into one device group.
- In Panorama select Panorama > Device Groups and edit each device group by adding HA-peer-1
- In Panorama select and Commit your changes.
Note: If the commit was successful the device groups should look like below screenshot:
Step 9:
- Push config to both devices.
- In Panorama select Commit > Push to Device and select both devices Device Groups and Templates.
- Select , and verify that the device group and template are in sync for the firewall.
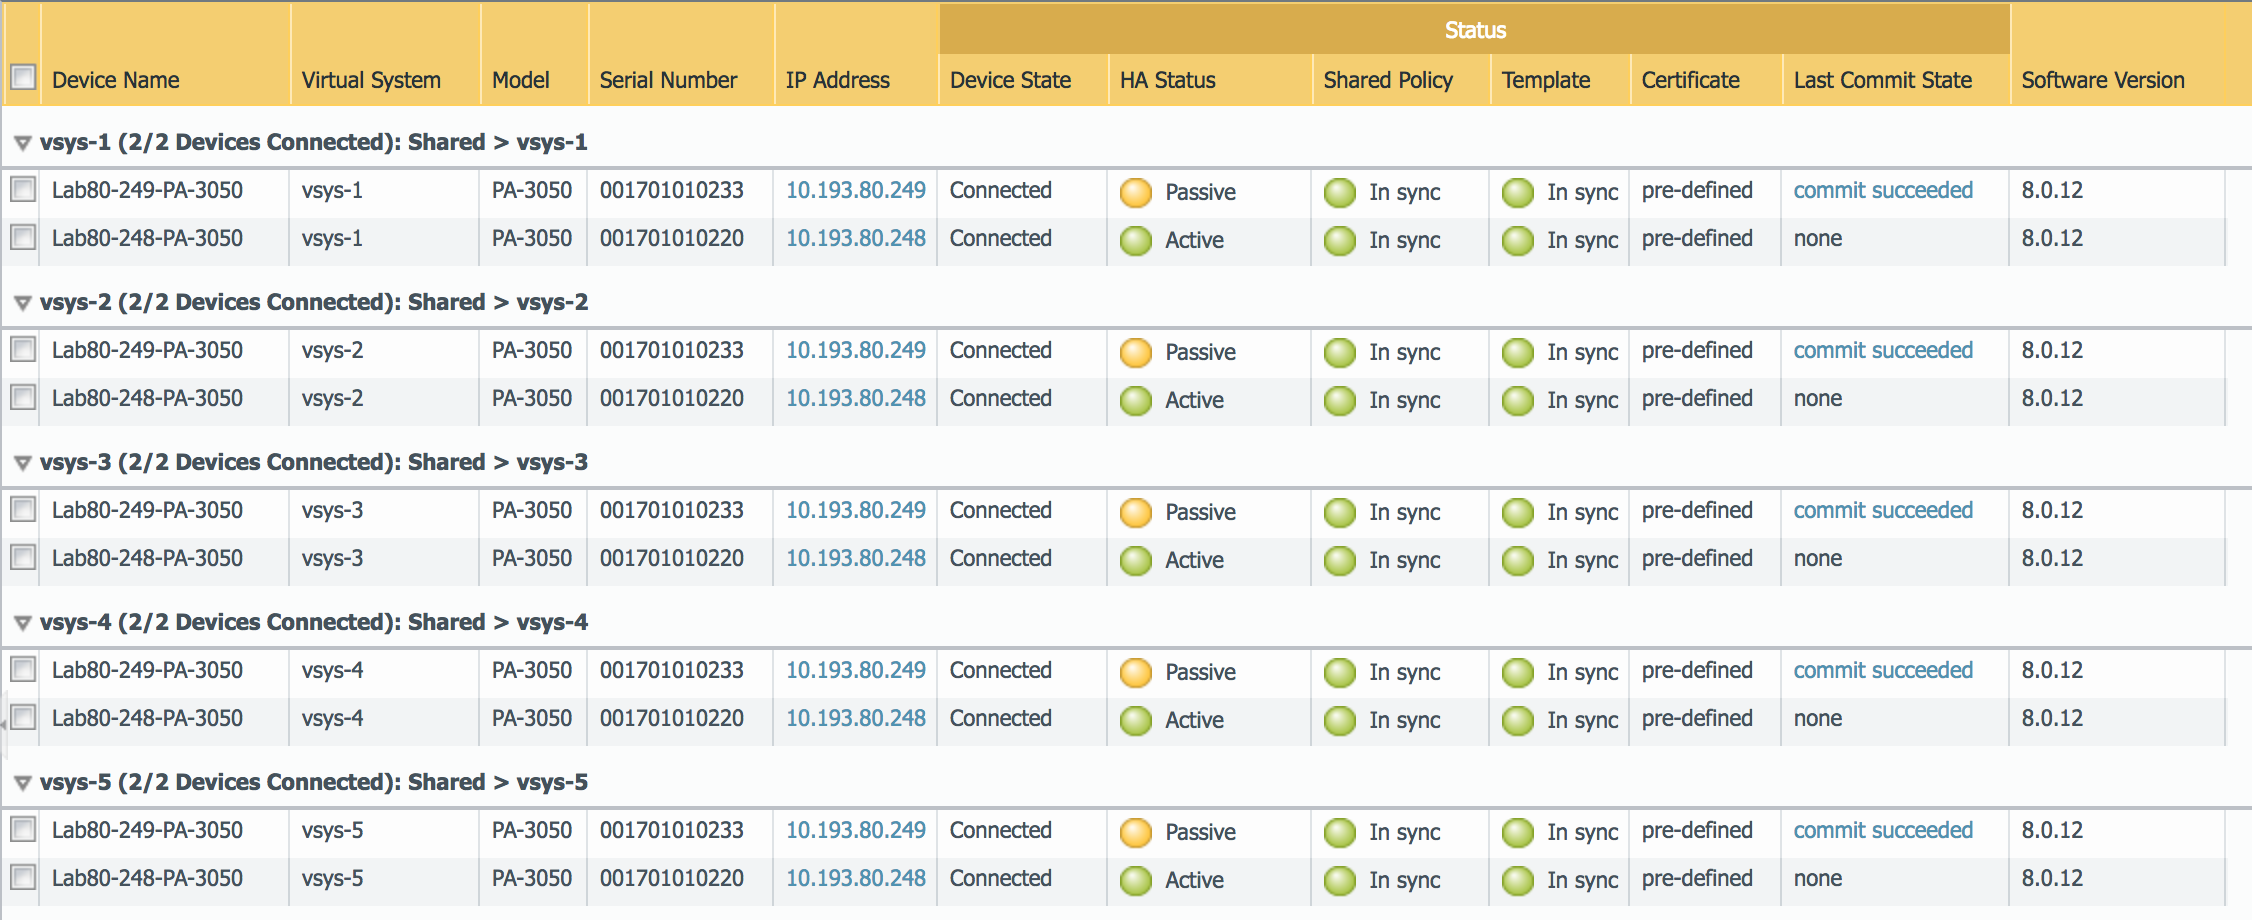
Note: If this step was successful the view should be as below screenshot:
Step 10:
- Enable configuration synchronization between the HA peers.
- Log in to the web interface on each firewall, select and edit the Setup section.
- Select Enable Config Sync and click OK.
- Commit the configuration changes on each firewall.