What is an Application Override?
Application Override is where the Palo Alto Networks firewall is configured to override the normal Application Identification (App-ID) of specific traffic passing through the firewall. As soon as the Application Override policy takes effect, all further App-ID inspection of the traffic is stopped and the session is identified with the custom application.
Example Use Scenario
You might ask why we'd ever need to override the normal application identification process. In some cases, customers build their own custom applications to address specific needs unique to the company. For these applications, we may not have signatures to properly identify the expected behavior and identify the traffic with a known application. In such cases, we recommended creating an application override to allow easier identification and reporting, and to prevent confusion.
Let's look at a typical scenario where you might use an Application Override policy. If you, for example, have a custom application that uses TCP Port 23, but traffic passing through the firewall is identified as temenos-T24, and the misidentification causes confusion about the traffic, then an Application Override can be implemented to correctly identify the traffic.
What You'll Need for Setup
To configure an Application Override, go to Policies > Application Override in the WebGUI. For setup, you'll need the following:
- Custom Application to be used in the Application Override policy (recommended)
- Application Override policy
- Security Policy that allows the newly created Custom Application through the firewall
Special Note about Content and Threat inspection
Application Override to a custom application will force the firewall to bypass Content and Threat inspection for the traffic that is matching the override rule. The exception to this is when you override to a pre-defined application that supports threat inspection.
Steps
To configure a new Custom Application for Telnet, which uses TCP Port 23:
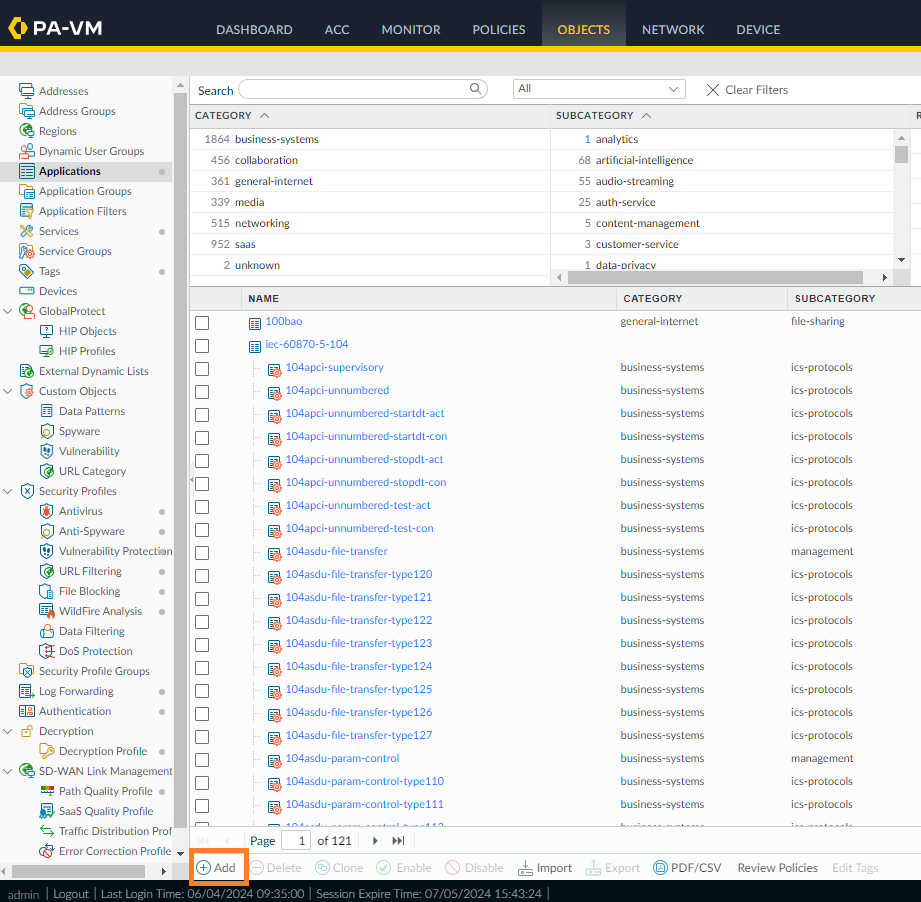
- Create a new Custom Application for the traffic in question. From the WebGUI, go to Objects > Applications, then click Add in the lower left.
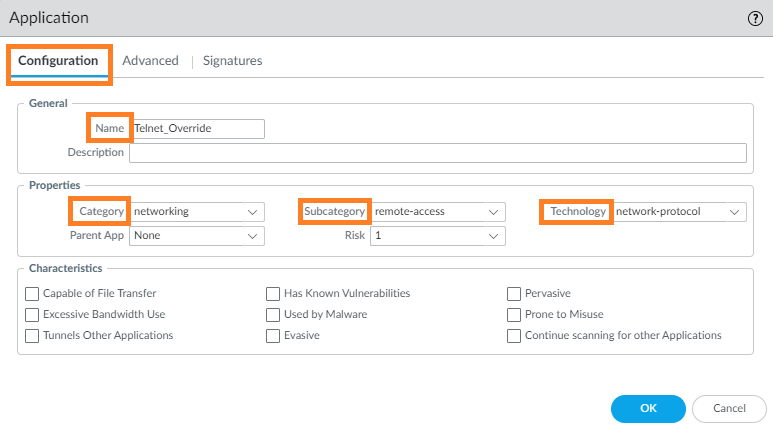
- Name the application (in this case, something other than Telnet, which is already used). The example uses Telnet_Override as the name. Also, select values for Category, Subcategory, and Technology.
- Optional Step: This just adds another layer of detail that is not always needed.
Go to Advanced > Defaults, and select Port to list the ports in the application.
The example below shows the ports being listed in the application:
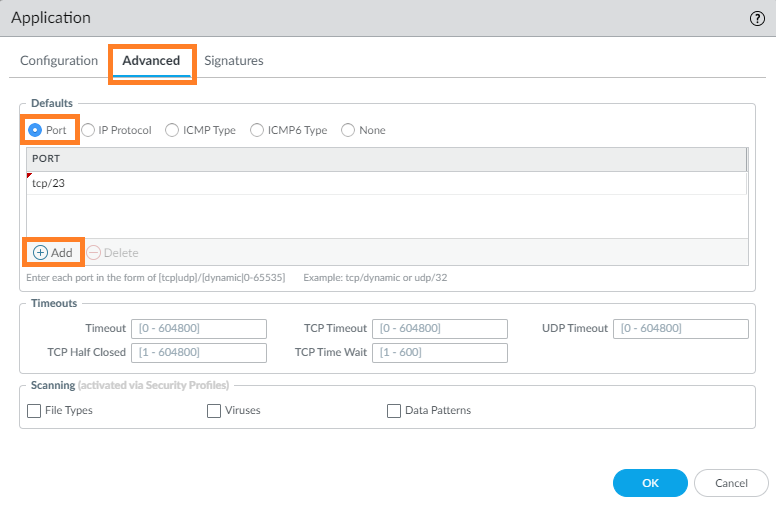
After selecting Port as the parameter, click Add and insert protocol and port, as required. In this example, we don't need a signature, so go ahead and click OK to complete this custom application. - To create an Application Override policy, go to Policies > Application Override, then click Add:
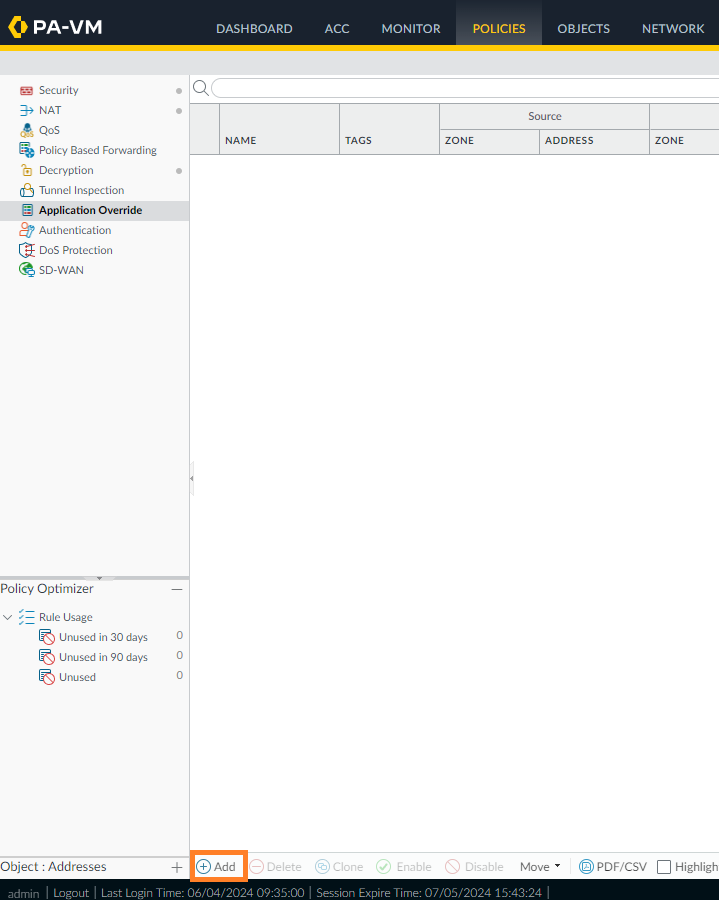
- Under the General tab, enter a name for the policy. The example uses Telnet_Override.
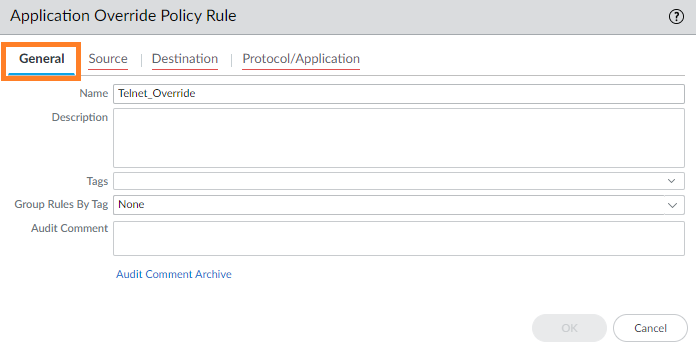
- Go to Source and add the Source Zone. Specify a Source Address (see example) if the source is a static address; otherwise, leave as Any.
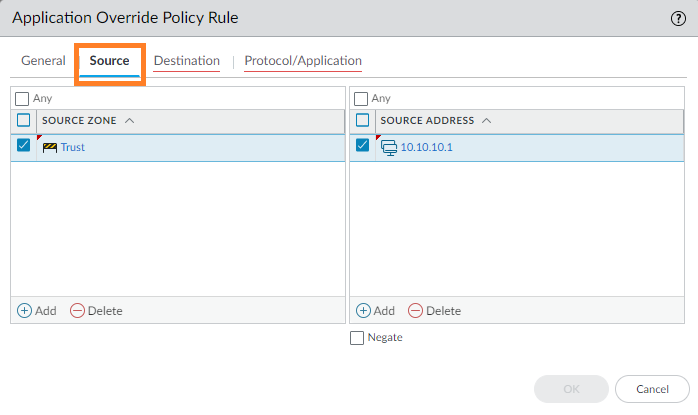
- Go to Destination, and add the Destination Zone. Specify a Destination Address (see example) if the destination is a static address; otherwise, leave as Any.
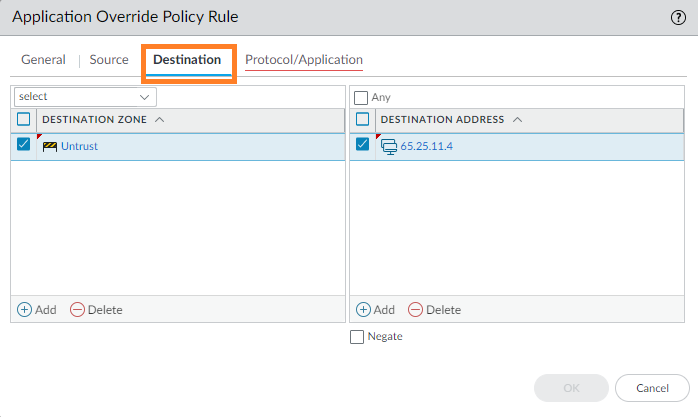
- Go to Protocol/Application and select the Protocol, enter the Port number, and select the custom application created.
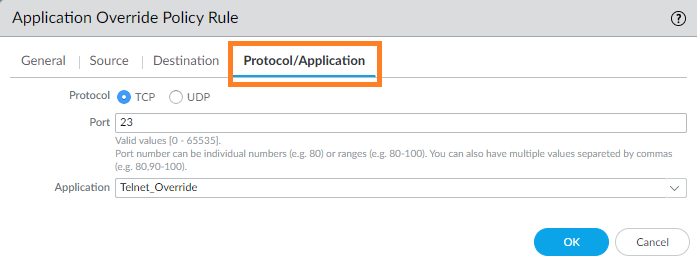
Using the Custom App, Verifying, and Testing
Now create either a Security Policy to allow this new application through the firewall, or modify an existing rule.
- To create a new rule, go to Policies > Security and click Add in the lower left. Create the Security Policy for the zones the traffic will pass through using the custom application. Specify the ports that will be used in the Service. All new sessions will be detected with the new custom application. Allow the traffic.

- Now commit and test. Traffic should use Telnet_Override as the application instead of either Telnet or temenos-T24 as discussed earlier.
- After committing the policy, run the command > show session all filter application Telnet_Override via the CLI to view session details.