See also: Video Tutorial: Custom Vulnerability
Want to block some very specific traffic? Custom vulnerabilities can help!
The Palo Alto Networks firewall supports custom vulnerability signatures using the firewall's threat engine. You can write custom regular expression patterns to identify vulnerability exploits. The resulting vulnerability patterns become available for use in all vulnerability security profiles. The firewall looks for the custom-defined patterns in network traffic and takes the specified action for the vulnerability exploit.
Using the Custom Vulnerability Signature page, you can define signatures for Vulnerability Protection profiles.
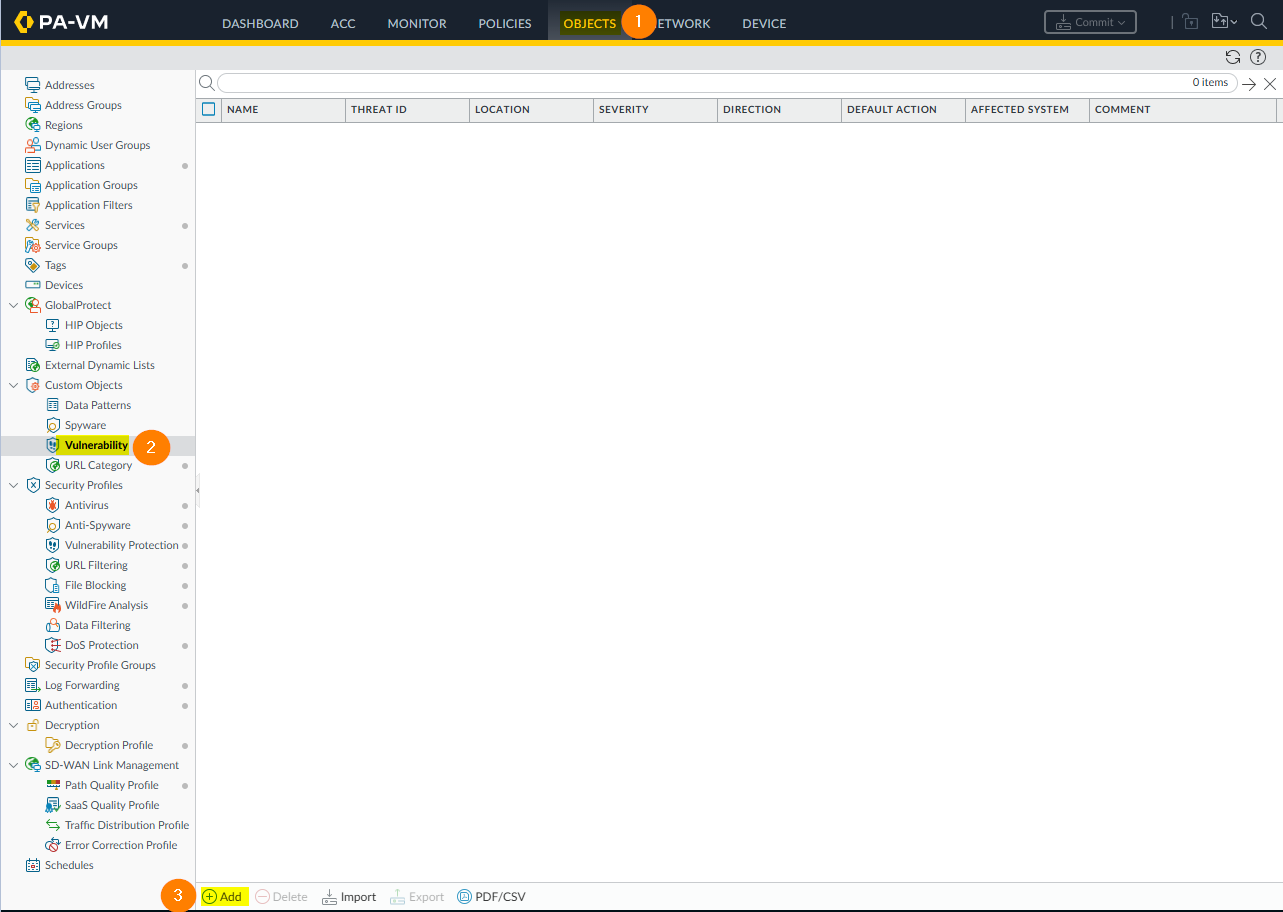
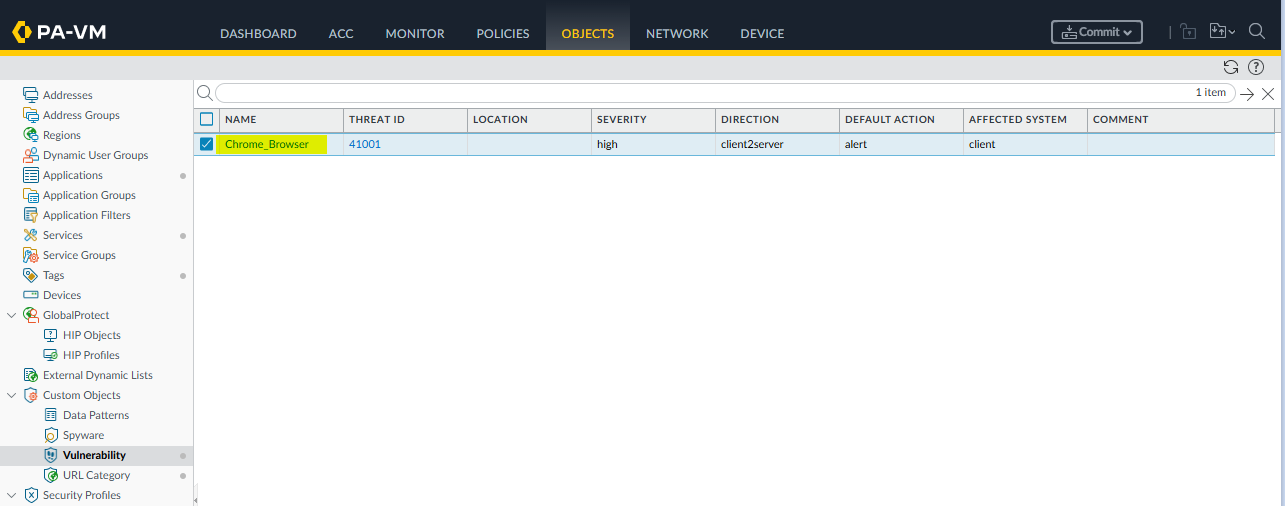
First, add the Custom Vulnerability Object at the Objects tab > Custom Objects > Vulnerability as shown in the example:
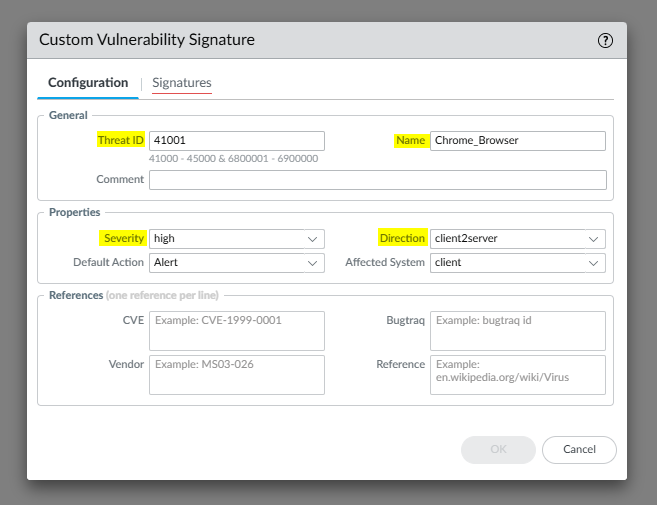
Fill out the Configuration tab, like below. In this use case, I'll show you how to match on a specific browser version.
Mandatory fields are:
Threat ID: A numeric identifier. For vulnerability signatures, the range is 41000-45000.
Name: Specify the threat name.
Severity: Assign a level that indicates the seriousness of the threat.
Direction: Indicate whether the threat is assessed from the client to server, server to client, or both.
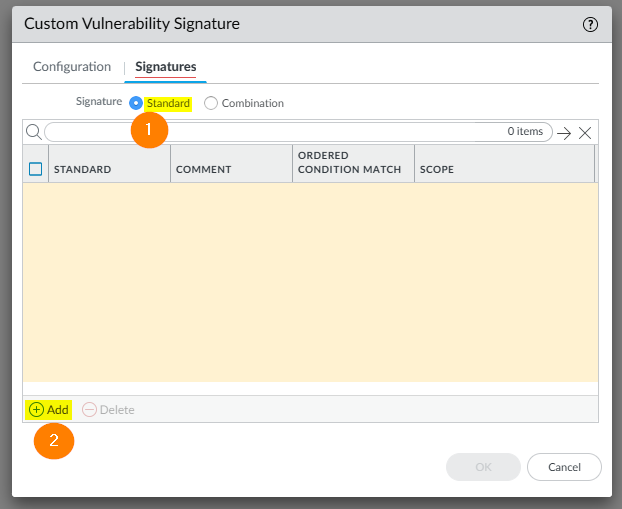
- Go to the Signatures tab to add a signature.
- Select the Standard radio button and click Add:
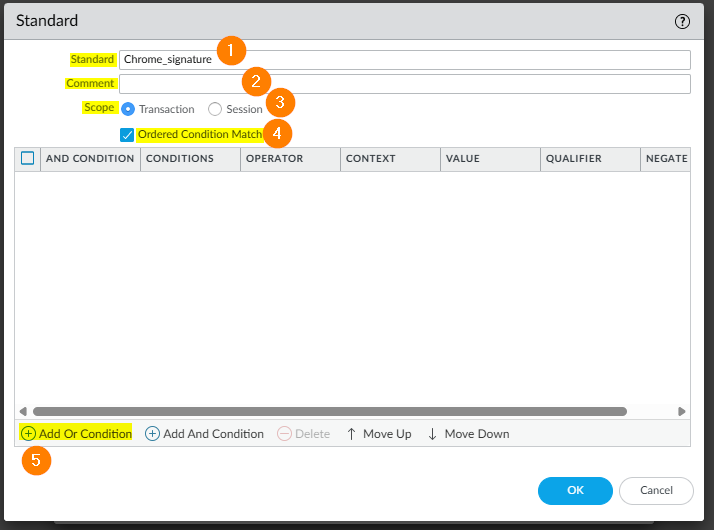
In the Standard window, complete the following:
- Standard: Fill in the desired name to identify the signature.
- Comment: Here you can add an optional description.
- Scope: Here you can select whether to apply this signature only to the current transaction or to the full user session. In this example, we'll go with Transaction.
- Ordered Condition Match: Select if the order in which the signature conditions are defined is important.
- Add Or Condition: Add and specify conditions to define signatures.
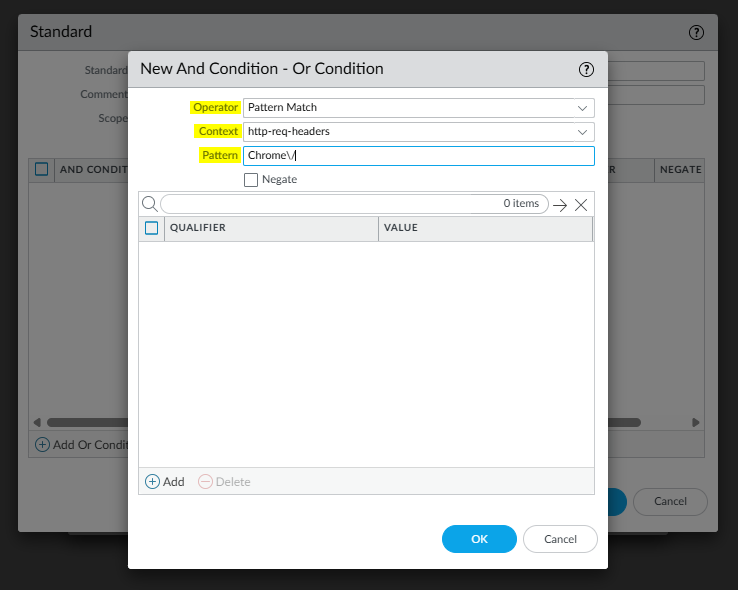
In the next window, we'll specify your signature match.
Operator: Defines the type of condition that must be true for the custom signature to match to the traffic. Choose from Less Than, Equal To, Greater Than, or Pattern Match operators.
When choosing a Pattern Match operator, specify the following for the signature to match to the traffic:
- Context : Select from the available contexts.
- Pattern : Specify a regular expression
- Qualifier and Value : Optionally, add qualifier/value pairs
- Negate : Select the Negate check box so that the custom signature matches to traffic only when the defined Pattern Match condition is not true. This allows you to ensure that the custom signature is not triggered under certain conditions
In this example, we'll look for the pattern match 'Chrome/' in the Context field 'http-req-headers' as shown in the example below:
Why match on Chrome/?
If you take a packet capture while browsing using a Chrome browser, you will find the following pattern match in the capture:

Click OK to create your custom vulnerability:
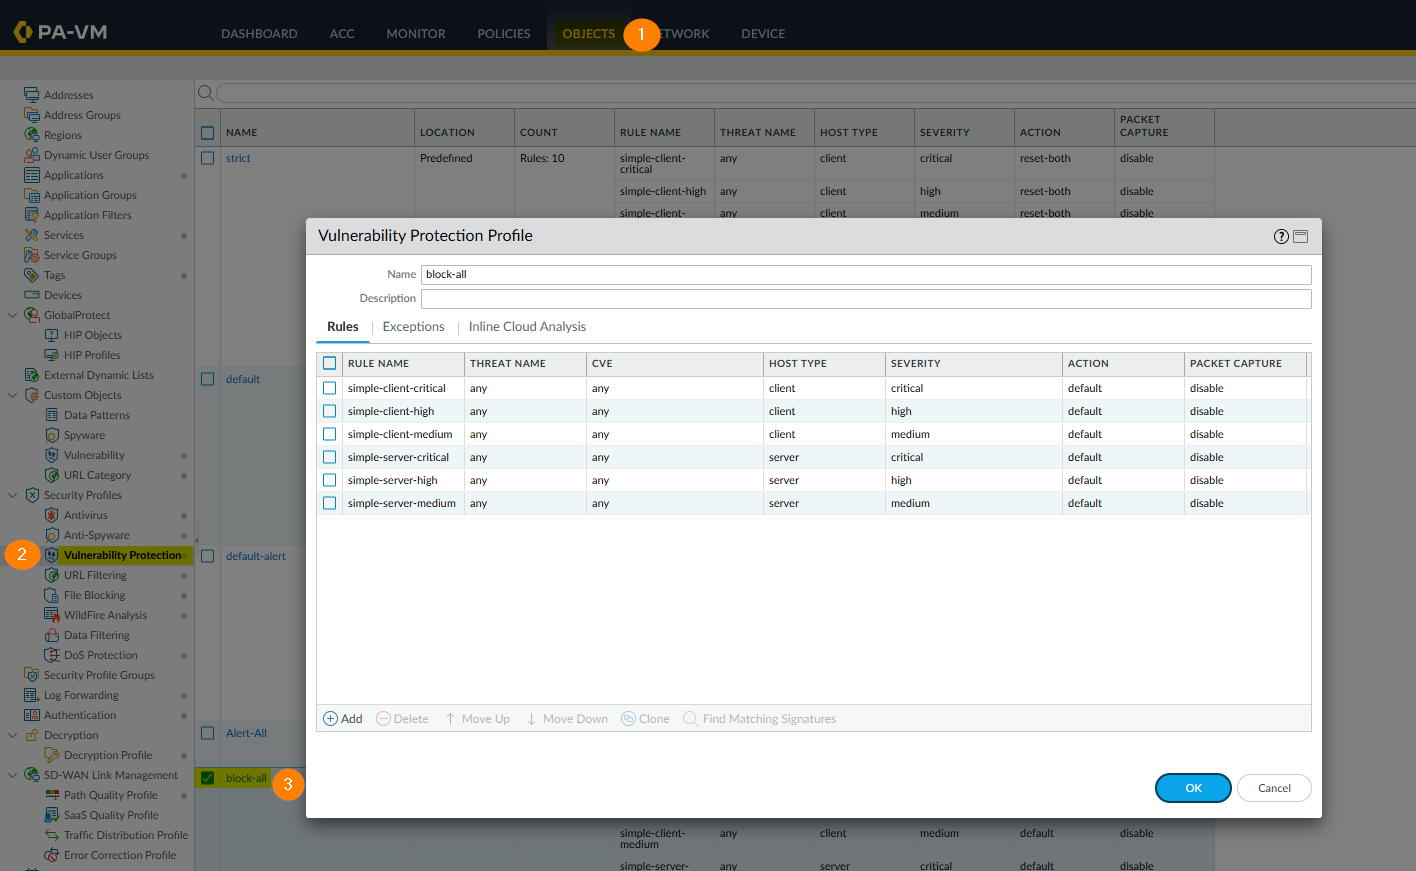
To enable your custom signature, go to Objects>Vulnerability Protection>Security Profile. Edit your profile
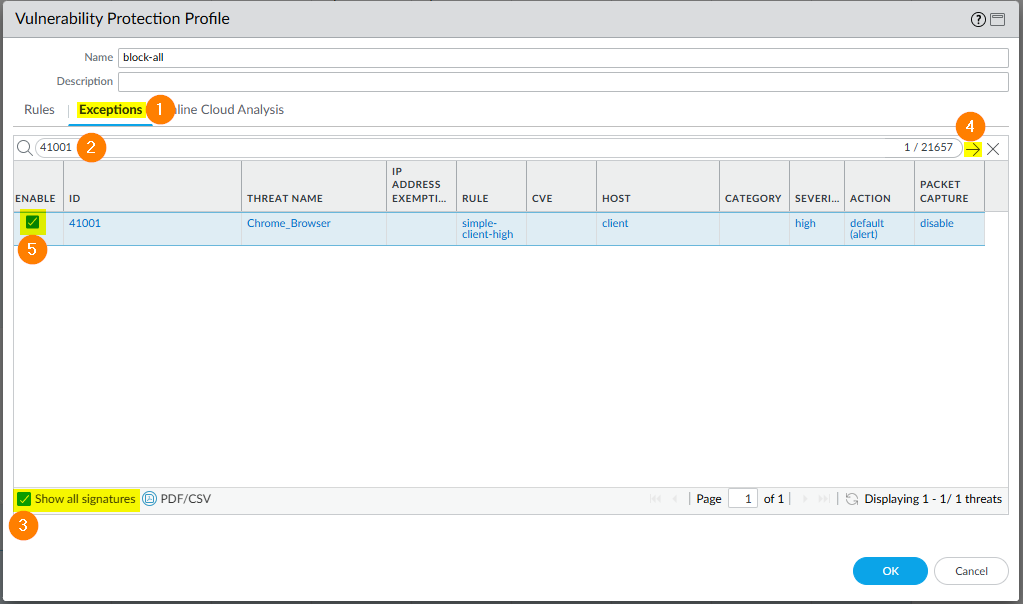
Click the Exceptions tab and search for the custom threat ID (41001). Make sure to check the Show all signatures box to list the searched TID
Don't forget to apply this Security Profile to your Security Policy:

After committing this change, you will get Alert messages in your Threat Log when you are browsing using a Chrome browser. Of course, the traffic can be blocked if you select to do so in your Action:

Note: Custom Signature will be enabled by default on all Vulnerability Protection profiles.
To apply the custom signature to a single profile, define its severity as 'informational', and default action in the signature definition as 'allow'.
Then create a Threat Exception in the Vulnerability Protection profile where you want to activate it, mark the 'enable' checkbox in the Exception, and change the signature's action to override the default 'allow'.
The rationale behind setting a signature's severity to an "informational" severity, is that otherwise it will match on all Vulnerability Profile rules, which are likely defined with actions by vulnerability severity, and will end up overriding the default allow action defined in the custom vulnerability signature.
This solution will work if the rule for informational severity vulnerabilities in all Vulnerability Protection rules is either missing, or set to execute the signature's default action. |