Configuring Group Mappings on Firewalls using Panorama without the master device.
127418
Created On 09/25/18 17:41 PM - Last Modified 11/17/20 20:49 PM
Environment
- PAN-OS 8.1 and above.
- Any Panorama.
- Group mapping Settings.
Resolution
Overview
This document describes how to configure and push LDAP and Group Mapping Settings from Panorama to the managed Palo Alto Networks firewalls.
Steps
Panorama does not have the ability to list the LDAP groups and cannot select which groups to add to the list, but is possible on the Palo Alto Networks device. Therefore, the following steps will use a combination of Panorama and the device to achieve the desired scenario:
- Create the LDAP profile configuration on Panorama and push that profile to the device
- Create a Group Mapping Settings on Panorama, which will filter the needed groups and push that configuration to the device
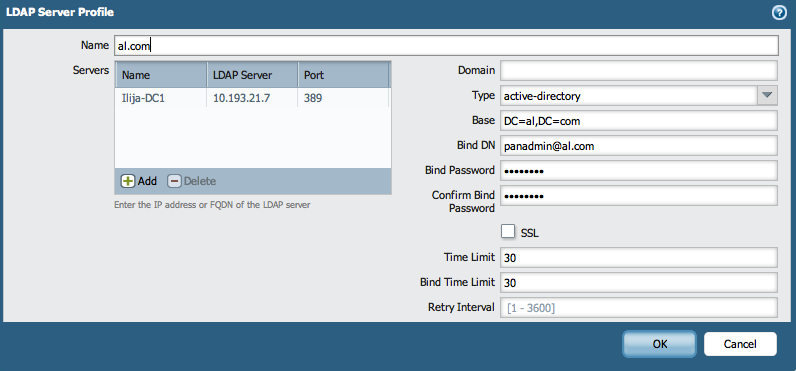
- On Panorama, go to Device > Server Profiles > LDAP Server Profile and create the LDAP Profile. Use the known parameters for the desired LDAP server.
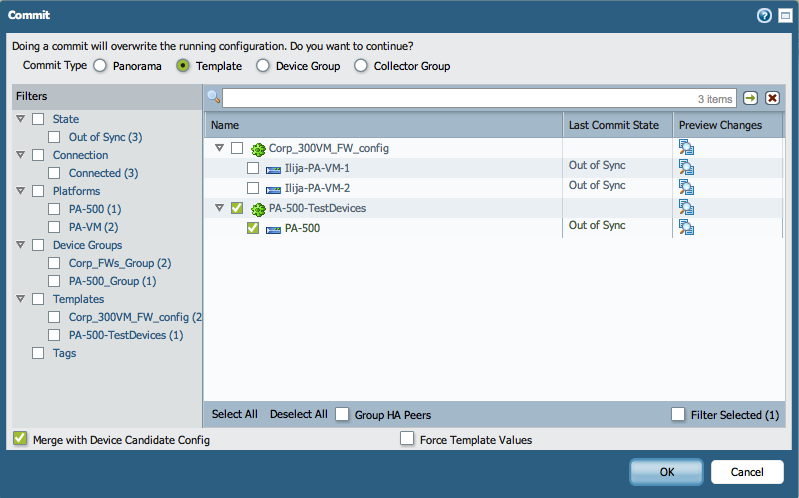
- Commit the configuration to Panorama and push the Template configuration down to one managed device.
- After Commit is completed, check the device to see if the LDAP profile is shown:

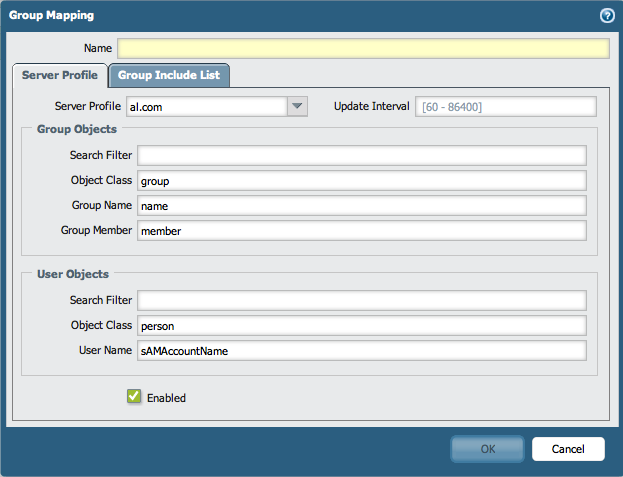
- Go to Device > User Identification > Group Mapping Settings and generate a new Group Mapping Profile. During the process, select the LDAP Server Profile that was pushed from Panorama.
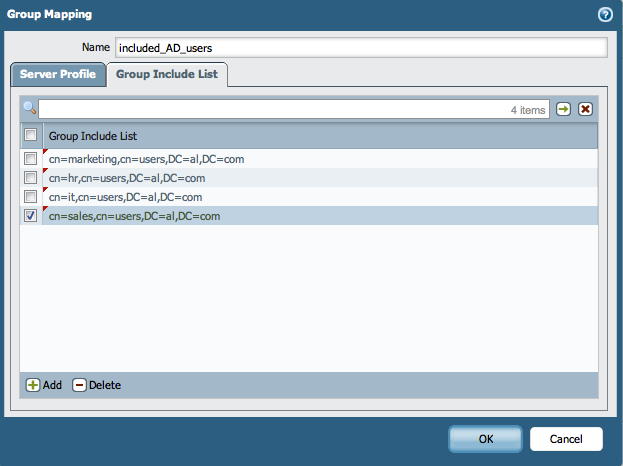
- In the Group Include List, add the groups needed that will be used on the firewalls for different reasons, (for example, creating security policies or allowing GlobalProtect access for users). Copy the groups Distinguished Names for the groups needed in a list as listed below:
cn=marketing,cn=users,DC=al,DC=com
cn=sales,cn=users,DC=al,DC=com
cn=it,cn=users,DC=al,DC=com
cn=hr,cn=users,DC=al,DC=com
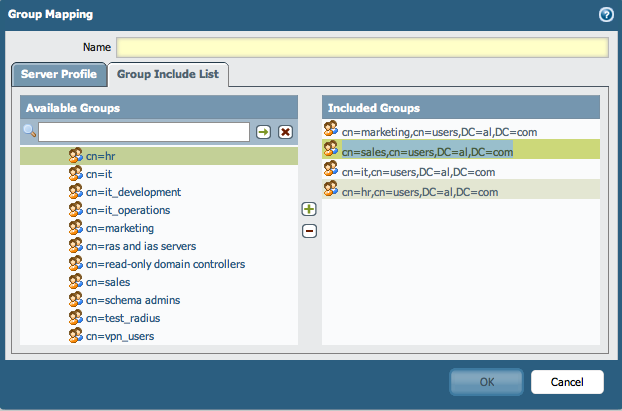
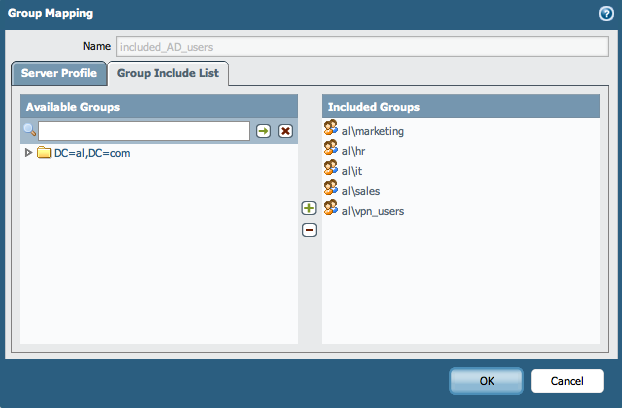
Cancel the creation of the Group Mapping on the device. The list will be pushed again from Panorama. - Paste the group names in the Group Include List under the Group Mapping on Panorama:
- Commit the configuration change on Panorama and push down the template to the devices:
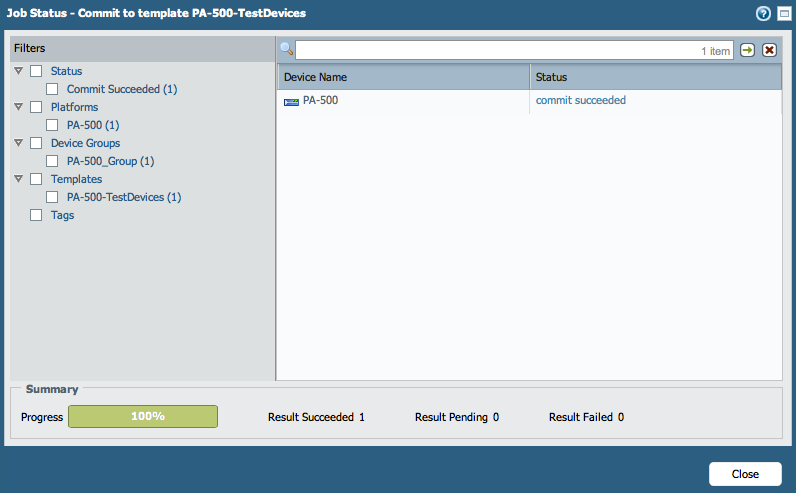
- Verify that the Group Mapping Settings is pushed down to the device:

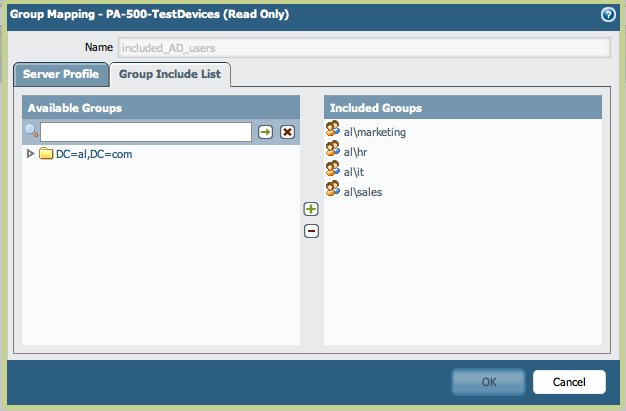
- Verify that the groups are listed in the Group Mappings Include List:
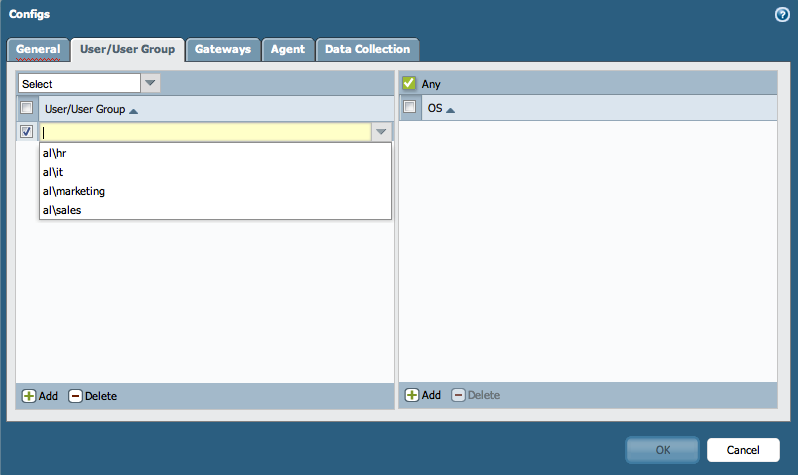
- Based on the pushed groups from Panorama, create security rules on the firewalls or allow GlobalProtect users from those groups to connect:
- For example, Security Policy:
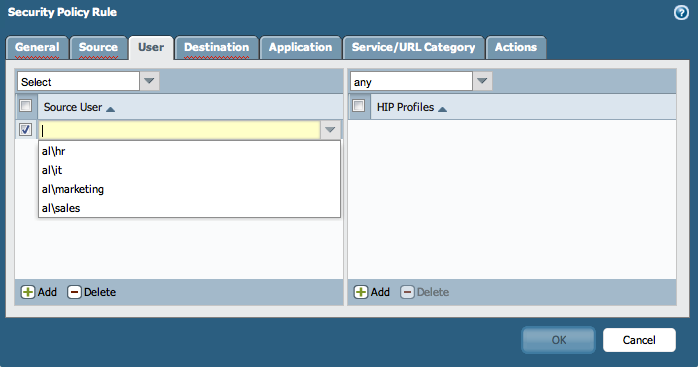 -
- - For example, GlobalProtect Portal:
From this point on, any new device that uses the same template configuration, will have the LDAP and the Group Mapping Settings already preconfigured.
The firewall administrators has the option to override the Group Included List in the Group Mapping and add locally significant groups by selecting them from the LDAP profile, (in this case that is the "al\vpn_users").
Additional Information
To configure the same with the Master device, Refer to the article How to configure panorama to pull group mapping information from a managed firewall with the master device.
Note: Using the master device will pull the group mapping information into Panorama.